|
<< Click to Display Table of Contents >> Toolbar |
  
|
|
<< Click to Display Table of Contents >> Toolbar |
  
|
❖New
Click it to create a new experiment.
❖Save
When the user saves a new experiment, the save dialog box will pop up. The user can set the save path and the name of the experiment. After the user opened the existing experiment, the experiment should be modified. The user can click the save button to save directly.
❖Save as
Save as the opened experiment.
❖Previous
Undo the previous operation.
❖Next
Resume an operation that has been undone.
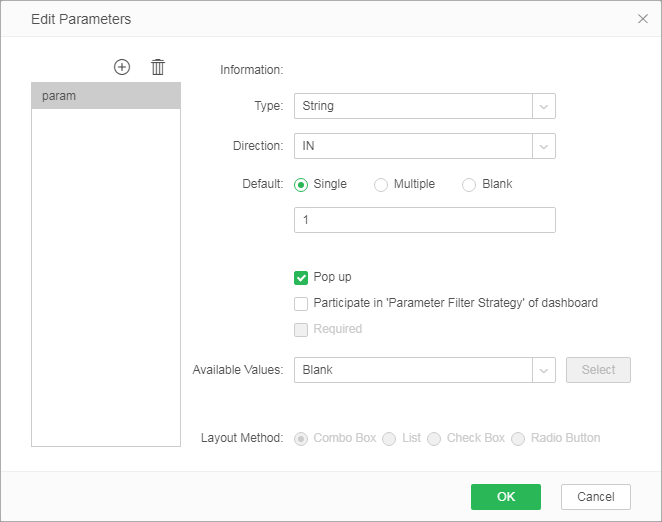
❖Edit Parameters
The current experiment can add, delete the parameters and collect the parameters used in the data set node. The editing parameter dialog box is as shown in the figure below.
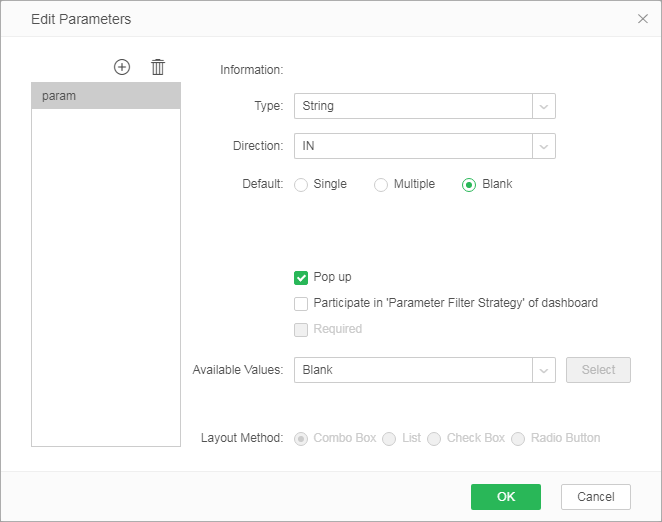
[Add/Delete]: If you click "Add" icon, a dialog for editing the name is displayed for you to set the parameter name. After setting the parameters, it is not supported to rename this parameter. The parameter collected cannot be deleted on such dialog, but such parameter can be edited. When the collected parameters are deleted from the initial position, the parameters can be deleted in the parameter dialog.
[Information] To show the position where the parameter is referenced.
[Type] The user sets the data type of current parameter.
[Default] The user can set default value of parameter. You can set a single value, multiple values, or a null value. When the user selects multiple values, these values need to be separated by comma.
[Pop up] When such item is selected, the parameter value input dialog will pop up if the user refreshes metadata, tests connection, previews data set or opens the data set in the editor.
[Participate in ''Parameter Filter Strategy'' of dashboard]: If you select this option, customized parameters will be controlled by the parameter filter strategy in the dashboard attributes.
[Required] Only after [Participate in ''Parameter Filter Strategy'' of dashboard] is selected, "Required" can be selected. After that, the parameter in the dashboard must be set; otherwise the dashboard data is null.
[Available Values] Data Set: The user may select a data set from the existing data sets, and select a data segment as the label and another data section as the value. If you do not select "Pop up" for the parameter, the corresponding value of this data set is transferred to such parameter. If you select "Pop up" for the parameter, the parameter value input dialog box will pop up, and the data will be displayed in a designated form. This product provides four display methods:Combo Box, List, Check Box, Radio Button.

If the user sets to pop up the parameter value input box in form of Combo Box, the parameter value input dialog will show the defaulted data set value as shown below when the user clicks to refresh metadata, test connection, preview data set or open the data set in the editor.
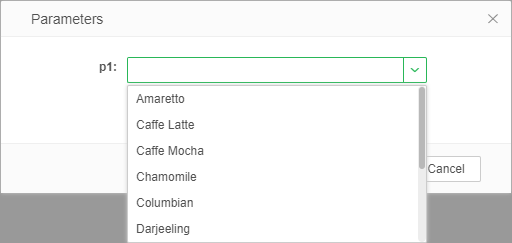
Values of the parameters added to the "Edit Parameters" dialog can also be entered manually. As shown in figure:

[Available Values] Embedded Data: Select the embedded data in the Available Values, and the right button is displayed as the Input Data. Click the "Input Data" to enter the input data dialog. As shown in figure:
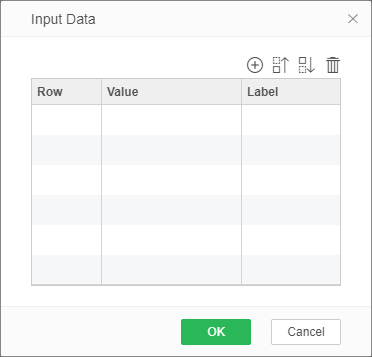
[Add] Click "Add" icon and enter data in the "Value" and "Label" columns.
[Delete] Select a data line and click "Delete" icon to delete the data.
[Move Up/Move Down] Select a data line and click "Move Up" or "Move Down" to change the position of the data line.
[OK] Click "OK" to confirm the entered data.
[Cancel] Cancel the input of data.
Enter data in the dialog, the value is not allowed to be empty, but the label can be empty, as shown in the figure below:
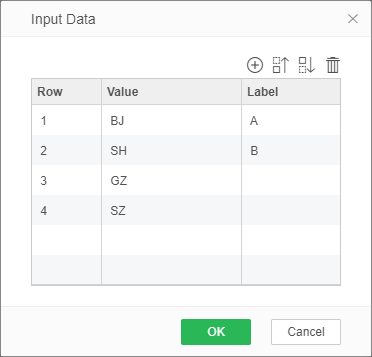
If the user sets to pop up the parameter value input box in form of list, the parameter value input dialog will show the inputted data as shown below when the user clicks the button "Refresh the parameter" and re-open the adhoc dataset dashboard in editing a dashboard:

If a label is recorded, the label is displayed. If no label is recorded, the value is displayed.
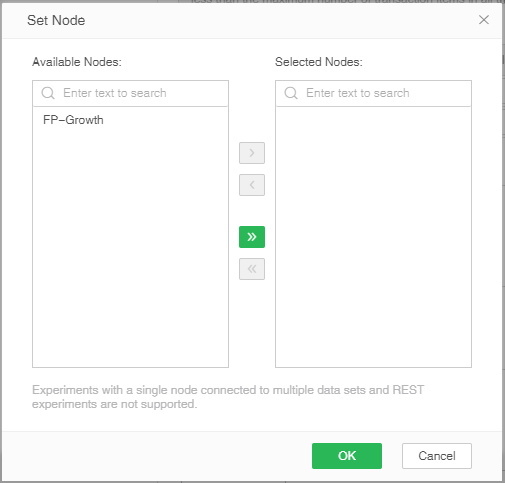
❖Set Node
Located under the toolbar, it is used to make report-side application experiments. Set the nodes that can be used to make reports, support the use of experiments when making reports, and generate new data through experiments. For specific usage, please check Advanced Analysis/Experiment and Application of Advanced Analytic.
❖Running Record
Under the More menu in the toolbar, it displays the running record of the current experiment.
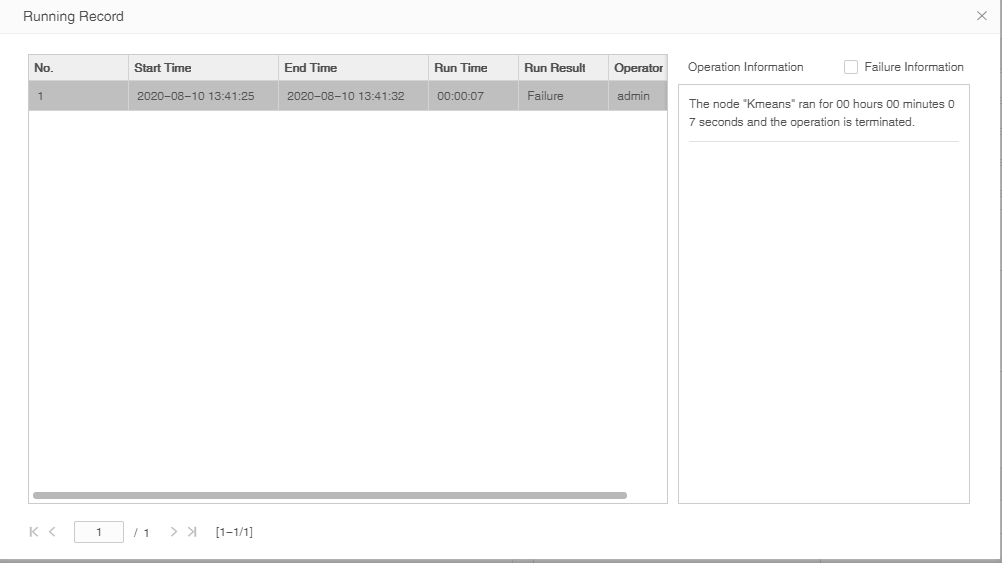
The start time, end time, run time, run results, operator and specific running information of the experiment are recorded.
The operation information shows the detailed data of each node's operation. You can filter out the information of successful nodes by checking the failure information.
The running record is recorded for 7 days by default, with a maximum of 100 data. If the number is exceeded or expired, it will be deleted. It can be modified by configuring the bi parameter. The default value of hold.experiment.execution.record.day is 7; experiment.execution.record.maximum.number The default is 100.
❖View Log
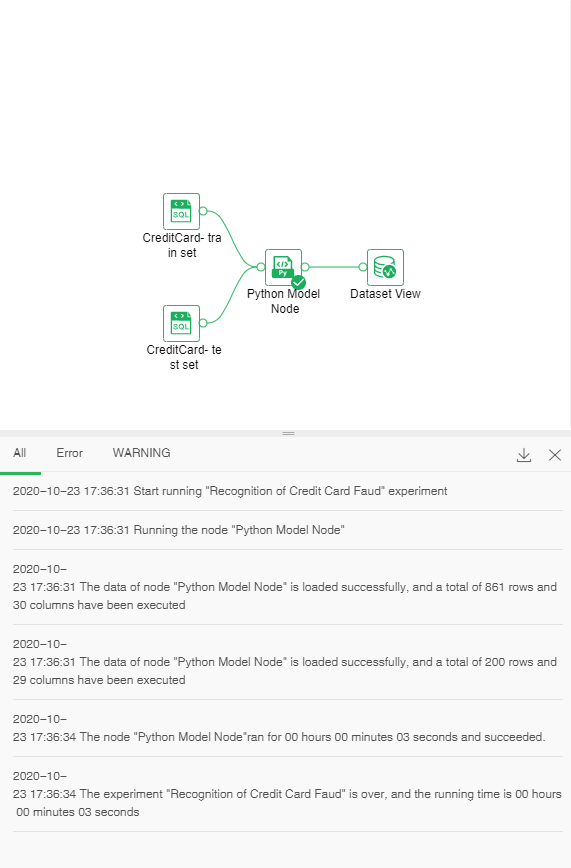
It is located under the More menu of the toolbar and is used to view the running log. The running log is generated when the current experiment is running, and a new running log is generated every time an experiment is run. Contains all, error, and warning labels.
Opening an experiment will not automatically open the log window, and running an experiment will automatically slide out of the log window.
Provide download and close of current log. You can adjust the size of the log window by dragging the mouse.
❖Service Configuration
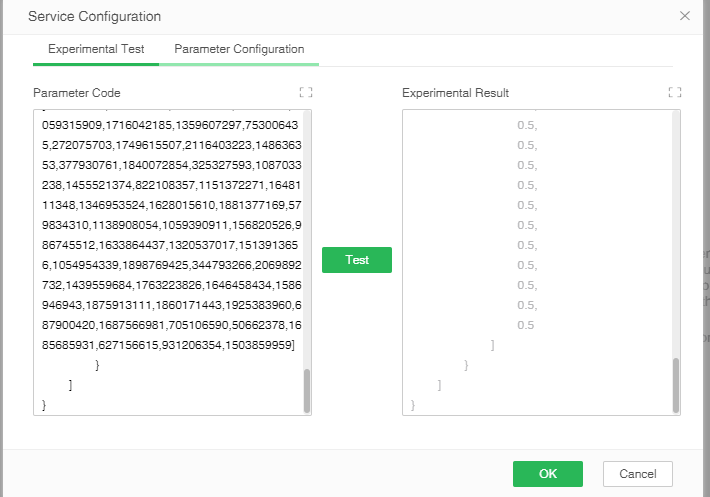
Located under the More menu in the toolbar, it is used for the experimental parameter setting of WEB service and test interface connectivity.
It can be used when an experiment has both REST request and REST response interfaces and forms a path.
•Experimental Test
1. Parameter code: the test data of the REST request node in json format, in a fixed format, you can view the description of the body format in REST API method description.
2. Experimental result: The calculation result obtained by REST response cannot be modified.
3. Test: Through the test button, the connectivity of the two nodes can be tested. You can check the chapter Deep Analysis\WEB Service to learn more about the specific content.
4. Confirm: Save the parameter code and experiment results.
•Parameter configuration
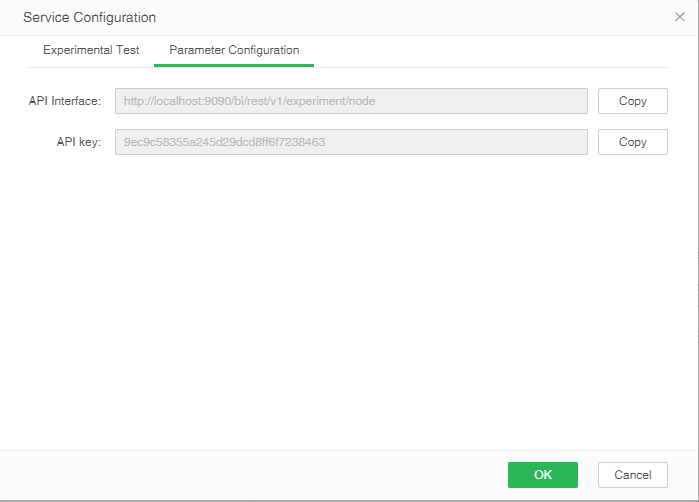
1. API interface: the url of the REST service, through which the interface can be called.
2. API key: The unique identifier of the REST service experiment, through which the experiment is run. Required parameters.
You can check the Advanced Analysis\WEB Service for more details.
❖Refresh Parameter
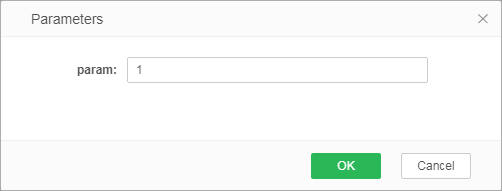
It is located under the More menu of the toolbar and to re-input the parameter value for the parameter that the pop-up status has been set. Suppose that parameter "param" pops up and has a default value of "1", as shown in the following figure.
When the user clicks to refresh parameter, the default value of this parameter will also be displayed, as shown in the following figure.
❖Experimental Setup
Located under the More menu in the toolbar, users can select whether to save experimental results. After checking, the results of the three views obtained from each run of the experiment will be saved after the experiment is saved. The user can open the experiment and view the results of the previous run without running it again. When the user set not checked, the results of the experiment after saving, will be cleared, open experiment you want to see the results need to run again, the results can not be saved to improve the storage speed experiments to solve the case of a large amount of experimental data results Next, save the problem of slow opening experiment.
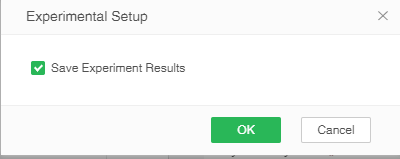
The newly created experiment is checked by default.
❖Close
Close current experiment. If the user has not saved the changes to the current experiment, the prompt dialog box will pop up.