|
<< Click to Display Table of Contents >> Job |
  
|
|
<< Click to Display Table of Contents >> Job |
  
|
A job contains time conditions, triggers, tasks, and subsequent tasks. For example, when the daily sales are less than 500,000, the sales report of the day will be exported to a PDF file on the next day at 8:00 and then sent to the sales manager's mailbox.
The product supports multiple scheduling job types. The settings for different jobs are different, but the process for creating new jobs is basically the same. This section will show you how to create a new scheduling job.
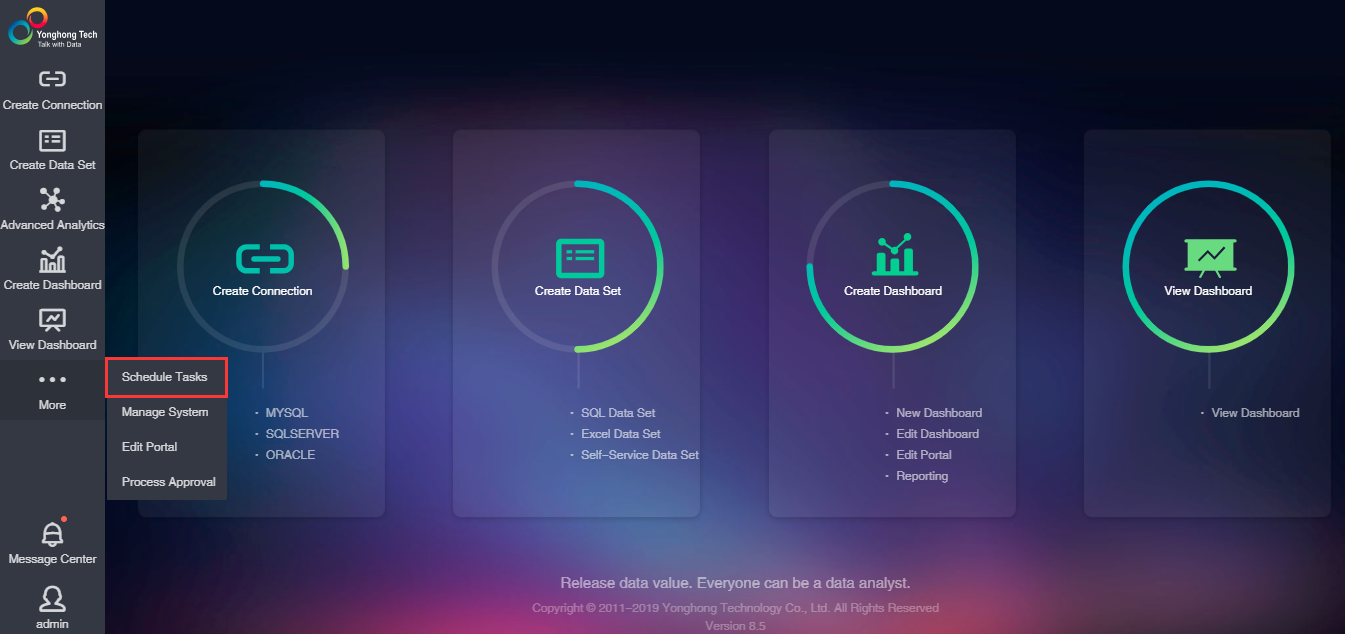
1. On the product home page, click the "Schedules Task" button to enter the interface for scheduling tasks.
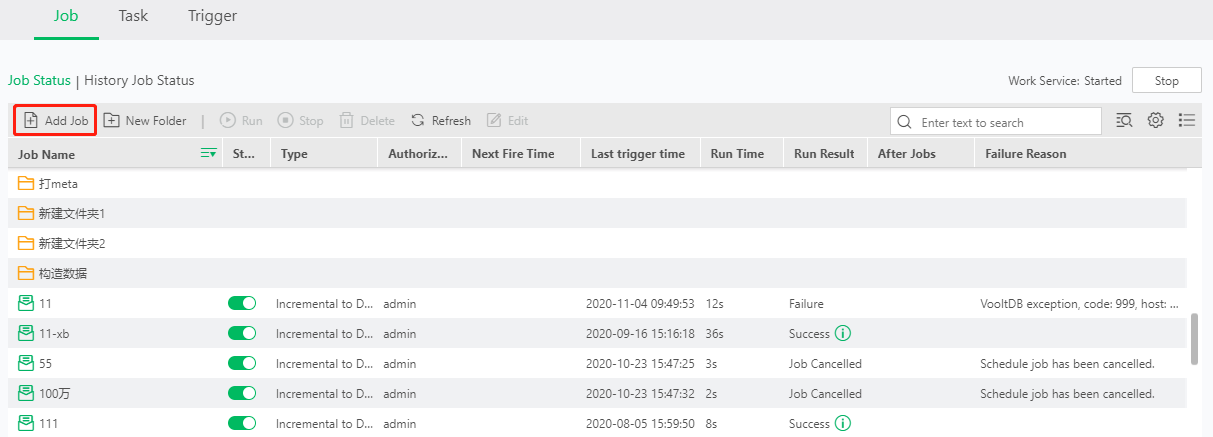
2.Click "Add Job" to open the new job interface.
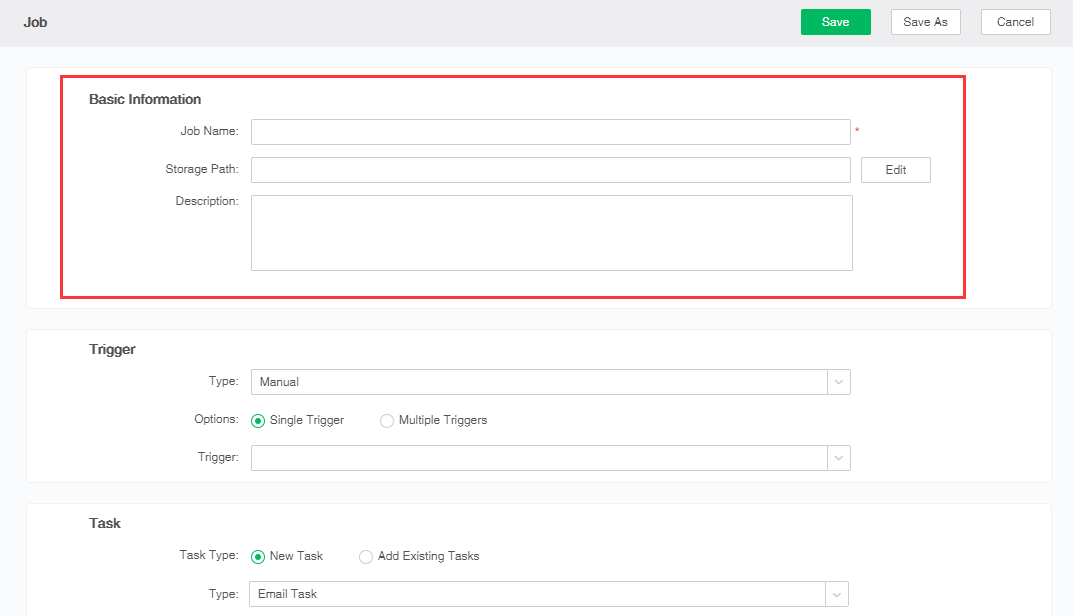
3. Set job basic information, including job name, storage path and job description.
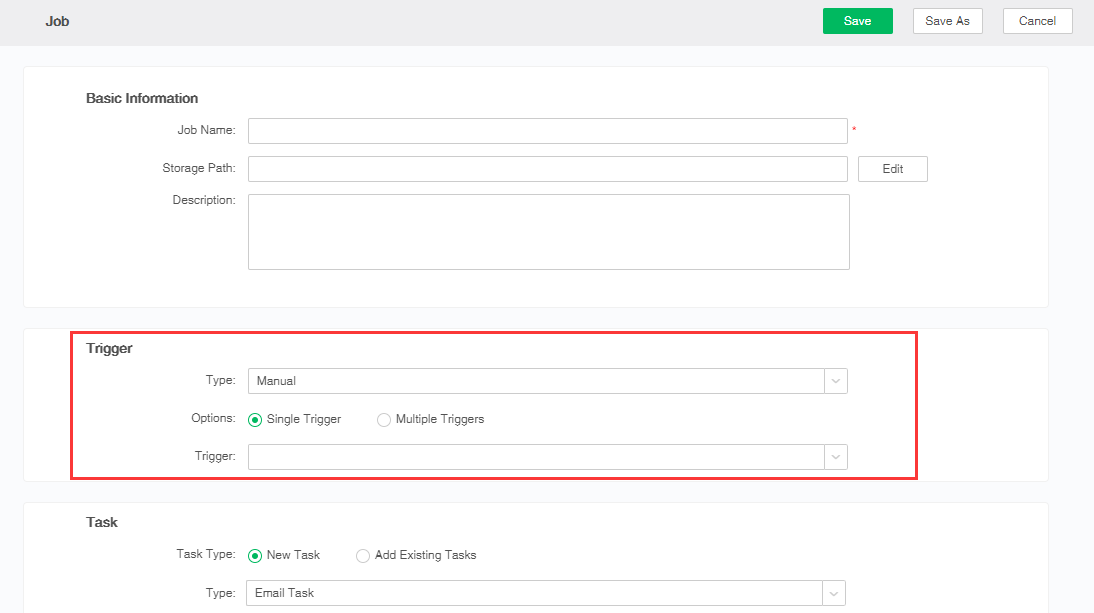
4.Select the trigger. The user can select the type used to set the type of time triggered, including manual, running once, daily, weekly, monthly, and custom. You can also select single trigger or multiple triggers, which is one or more trigger conditions for the job, the single trigger is selected by default. To select a trigger, you need to create a new trigger in the trigger interface before you can select it here. For details on creating a new trigger, refer to Schedules Task->Trigger and Subsections.
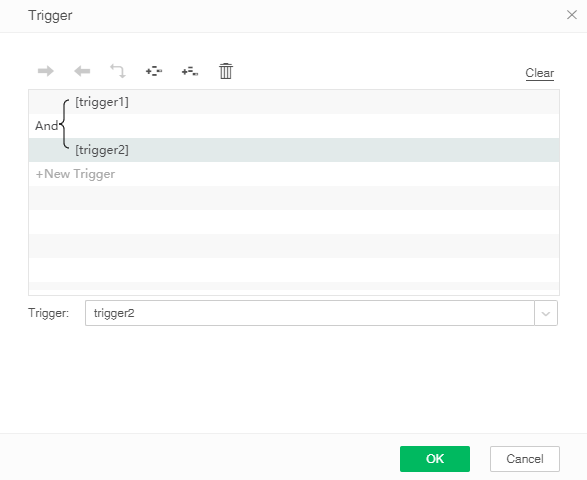
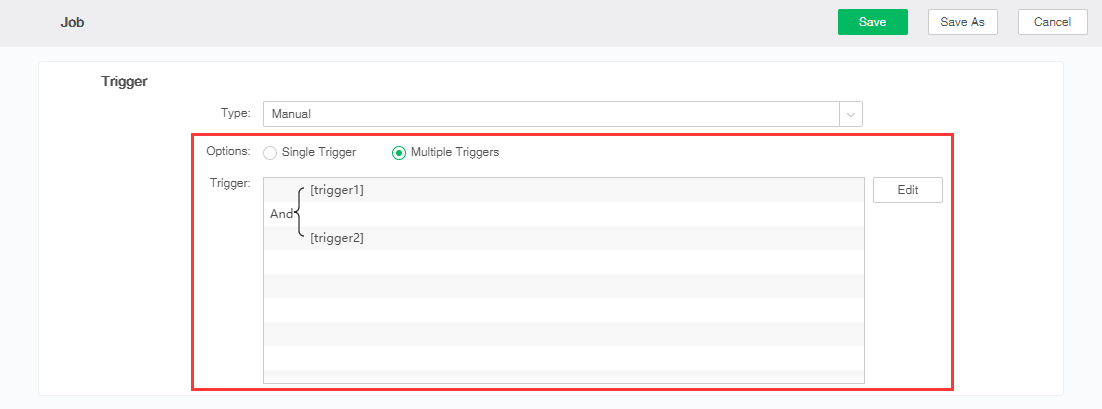
When "Multiple Triggers" is selected, the trigger option becomes a display box, and when you click the "Edit" button, the trigger dialog box will pop up. Click "New Trigger" to add multiple triggers and edit the trigger's "and" or "or" relationship. Only when multiple trigger conditions are met the job execution will be triggered, as shown in the following figure:
➢Trigger type description
•Run Once When meet the trigger condition, execute current operation once more. When the user switches the type, a dialog will pop up as shown in the figure below. When the user clicks time conditions, a dialog will pop up once more. Click to pop up the drop-down box. The user can set the start time:Starting from the set start time, the current job is executed once for each trigger condition.
•Daily When the user switches the type to daily, a dialog will pop up as shown in the figure below. When the user clicks time conditions, daily dialog will pop up once more. Click to pop up the drop-down box. The user can set the start time. And the user can execute the job at an interval of every few days. If the user sets the starting time as 2017/04/2617:41:54 at an interval of 1 day, the next triggering time is 2017/04/27 17:41:54.
•Weekly When the user switches the type to weekly, a dialog will pop up as shown in the figure below. When the user clicks time conditions, weekly dialog will pop up once more. Click to pop up the drop-down box. The user can set the start time. And the user can execute the job at an interval of several weeks. If the user sets the starting time as 2017/04/2617:41:54 at an interval of 1 week and trigger on Sunday. The next triggering time is 2017/04/27 17:41:54.
•Monthly When the user switches the type to monthly, a dialog will pop up as shown in the figure below. When the user clicks time conditions, monthly dialog will pop up once more. Click to pop up the drop-down box. The user can set the starting time. The user can set certain day of a month or the weekday of certain month. When setting the first few weeks of the first few months, note that the beginning of the month is not starting from Sunday.. For example, the first week of Oct. has no Monday. The first Monday of this month should be Monday of week 2. If certain day of month is selected, the starting time is the 10th day of Jan., 2012-09-1116:50:03, then the next triggering time is 2013-01-1016:50:03. The current task can be executed when meet the triggering time and triggering condition simultaneously.
•Customized When the user switches the type to custom, the custom dialog will pop up as shown in the figure below. The user can select seconds, minutes, hours, days, months, weeks, and years, respectively. The selected value can be a value (such as 6), a continuous interval (9-12), and an interval (2/4). ), A list (1, 3, 5) can also be a wildcard. The custom assist generator is simple and flexible and can automatically generate periodic and periodic trigger times, as shown in the following figure. When the user sets the custom time, click on the time condition line again, the custom dialog will pop up again.
➢Wildcard description: * indicates all values. For example: Set a "*" on the minute field which indicates that it will be triggered in every minute. ? indicates unspecified value. The scenario used does not need to care about the value of the current setting. For example: An operation should be triggered on the 10th of each month, not concerning the day in a week. Therefore, the field of week position is set to "?". Set to 0 0 0 10 * ? specifically. The week and date field cannot be set to "?" simultaneously. -Indicates the range. For example, time range is "10-12" which means that it will be triggered at 10, 11 and 12 o'clock. Represents a number of values. For example, set "MON,WED,FRI" on the weekly field to represent Monday, Wednesday and Friday. / Used for incremental trigger. For example, set "5/15" as second which means that it will start from 5s and trigger once per every increasing of 15s (5,20,35,50). Set ”1/3” as month field which means that it will start from the 1st day of each month and trigger once per every three days. L means the last. For day field setting, it means the last day of current month (According to current month, if it is set to February, you should determine whether it is a leap year). Set Saturday as week field, equivalent to "7" or "SAT". If add a number before "L", it means that the data is the last one. For example, set the format "6L" on week field which means "the last Friday of current month". W indicates the working day closest to the specified date (from Monday to Friday). For example, set "15W" as the date field which indicates that it is triggered at the closest working day of the 15th of each month. If the 15th day of that month is Saturday, it will be triggered on the nearest Friday (the 14th day). If the 15th day is weekend, it will be triggered on the nearest next Monday (the 16th day). If the 15th day is a working day (Monday to Friday), it will be triggered on current day. If the specified format is "1W", it will be triggered on the nearest working day after the 1st day of each month. If the 1st day is Saturday, it will be triggered on the next Monday, namely the 3rd day of the month. (Only a specific number can be set before "W". The interval "-" is not allowed). "L" and "W" can be used in combination. If set "LW" as day field, it means that it will be triggered at the last working day of the month (Generally it refers to the payoff date). #Serial number (Refers to week day of each month). For example, set "6#3" as week field which indicates the third Saturday of each month. Note that if it is specified as "#5", and there is no Saturday in week 5, the configuration will not be triggered. If the English letter of week field setting is not case sensitive, MON and MON are the same. ➢For example: Time condition is set as 2012-09-22 15:29:49[0 0 0 ? * 1] which means that it starts from 2012-09-22 15:29:49. Current task will be executed on each Sunday. |
5.Set up tasks. The user can create a new task when creating a new job, or select one or more existing tasks from the task list.
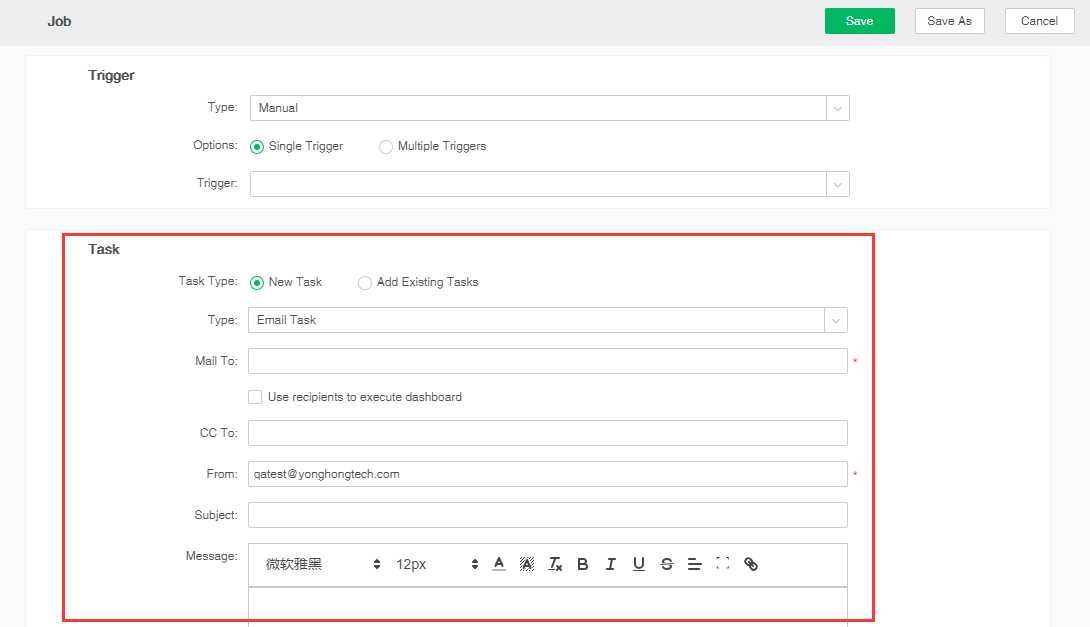
When you select "Add Existing Tasks", click the "Add" button to select the corresponding task.
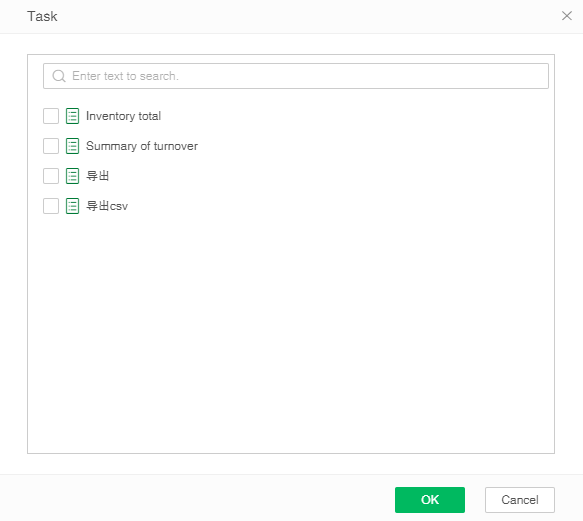
After clicking "OK", the name of the corresponding added task is listed in the task list.
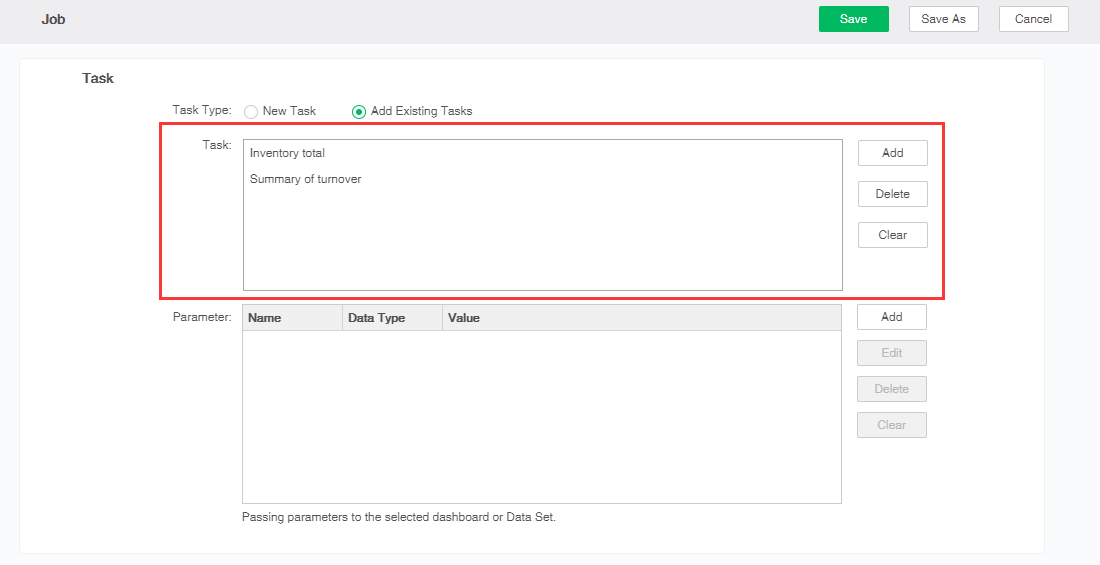
➢Description: When only one task is added to the task list, the current job status interface type displays the job type corresponding to this task.
Different task types require different setting items. For a detailed description of each task type, refer to Schedules Task->Task and its subsections.
6. Set the parameters. The user clicks on the Collect button to collect all the parameters of the currently selected dashboard or dataset, including the name of the parameters, the parameter data type, and the parameter values. When the user needs to add a parameter, click the Add button to pop up the parameter dialog box. The user can set the name of the parameter, the data type of the parameter, and the parameter value.
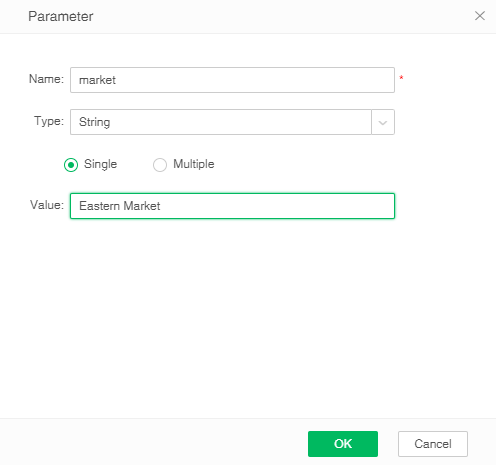
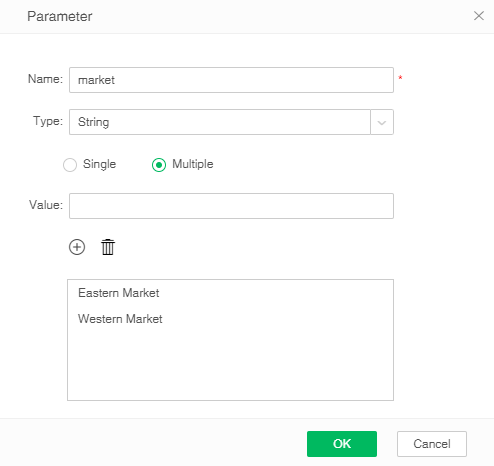
When the user selects multiple items, multiple parameter values can be set, as shown in the following figure.
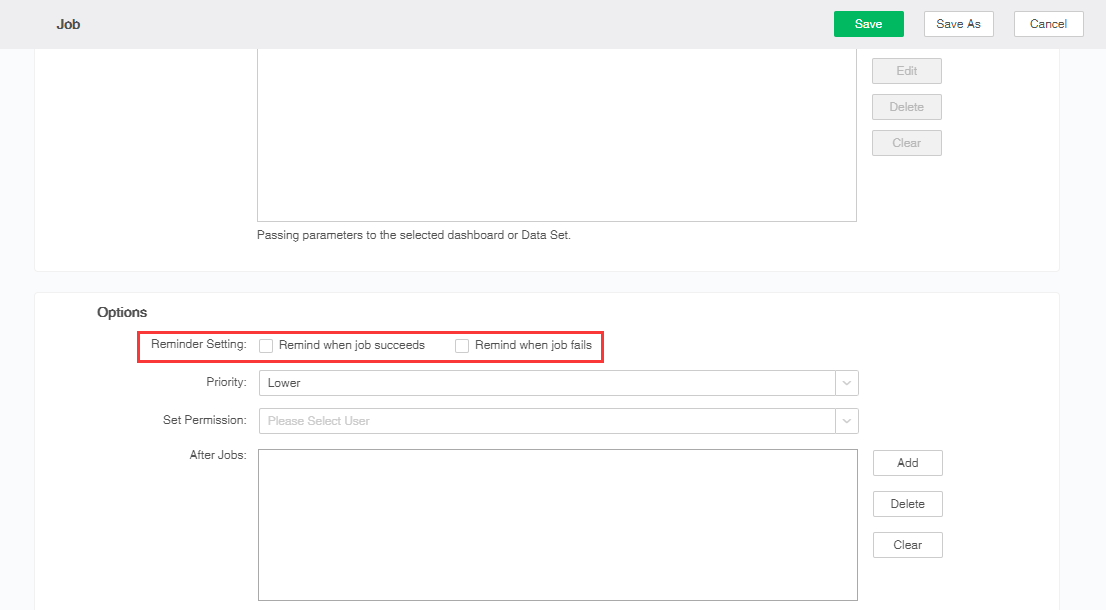
7. Configure reminders. The user can give feedback on the results of the task execution. For details, please refer to Schedules Task -> Alert Job Execution Results.
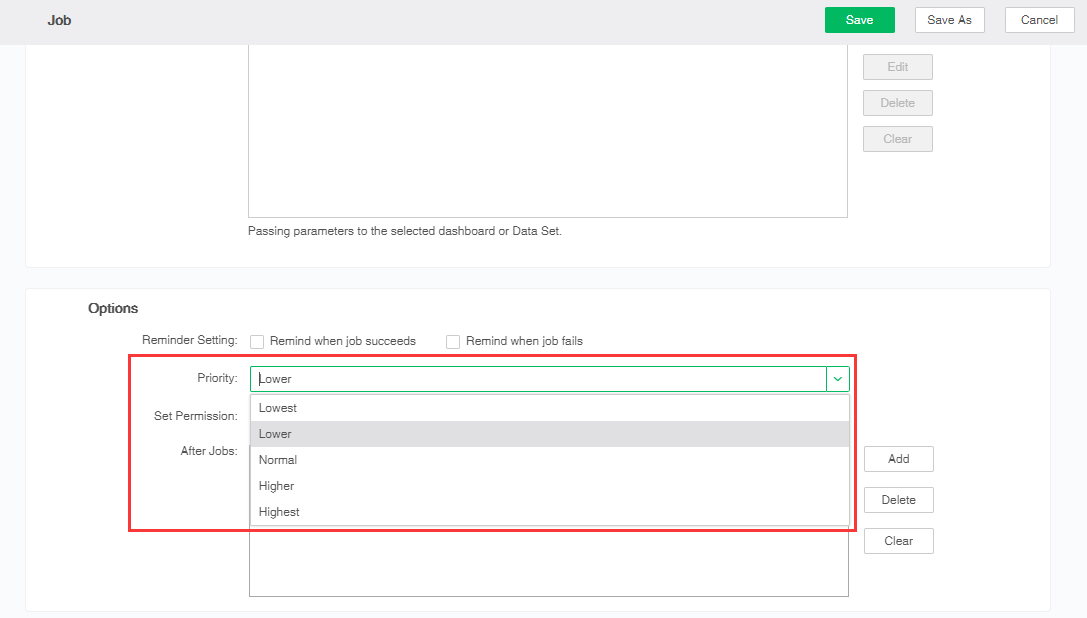
8. Set job priority. The job's priority is divided into five levels: lowest, lower, medium, higher, and highest, and the default is lower. In the case of competing resources, the execution sequence of the job can refer to the following principle: first, which job is to be executed first according to the user's priority of executing the job; if the user's priority is the same, the job having the high priority is executed first. In order to avoid that some low-priority jobs cannot be run for a long time, dynamic adjustments to the job priority are added to the product so that the job can gradually increase its own priority as the waiting time increases. When the priority is reached After a certain level, it will be executed successfully, thus avoiding the problem of waiting too long or not being able to perform at all.
➢Description: The job's priority is independent of the dependent dashboard's priority.
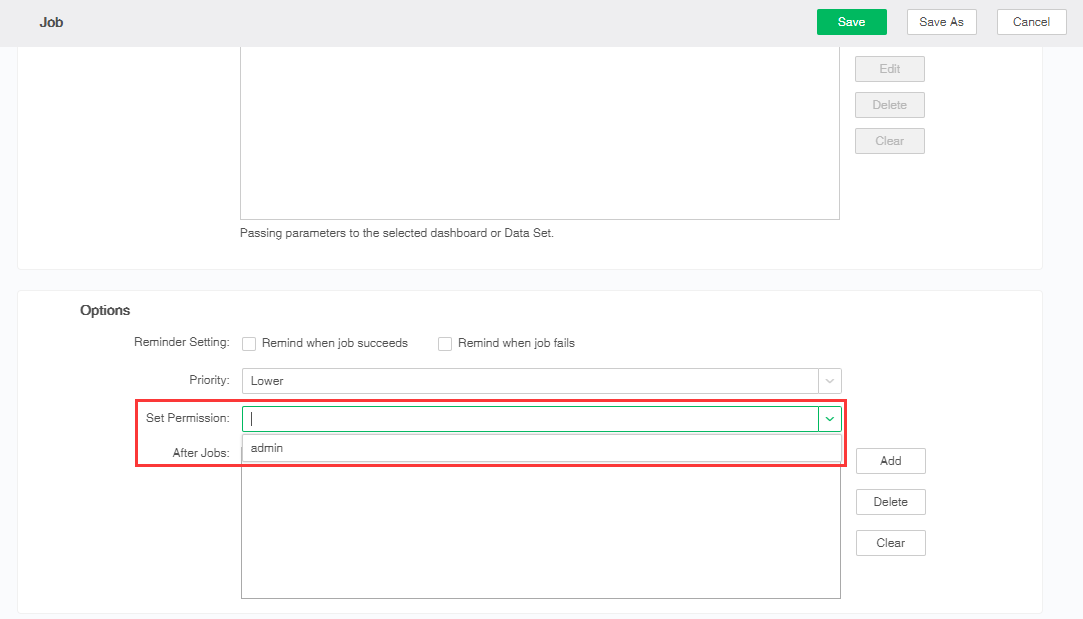
9.Assigning permissions to a job gives a user permission to edit and execute the job. For details, please refer to Schedules Task ->Set Permission.
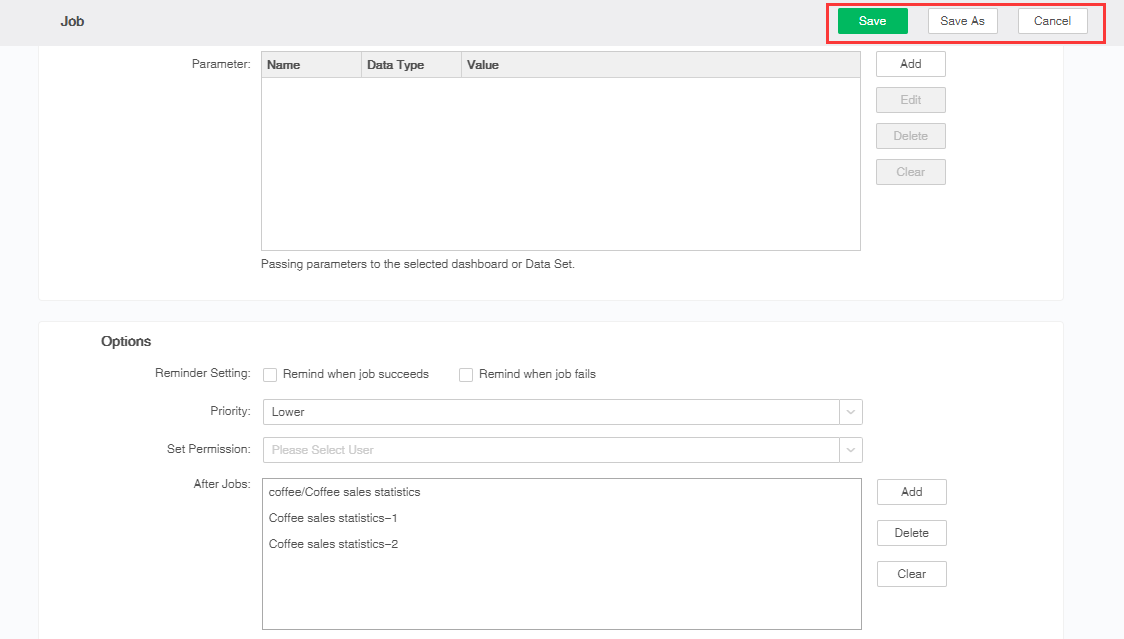
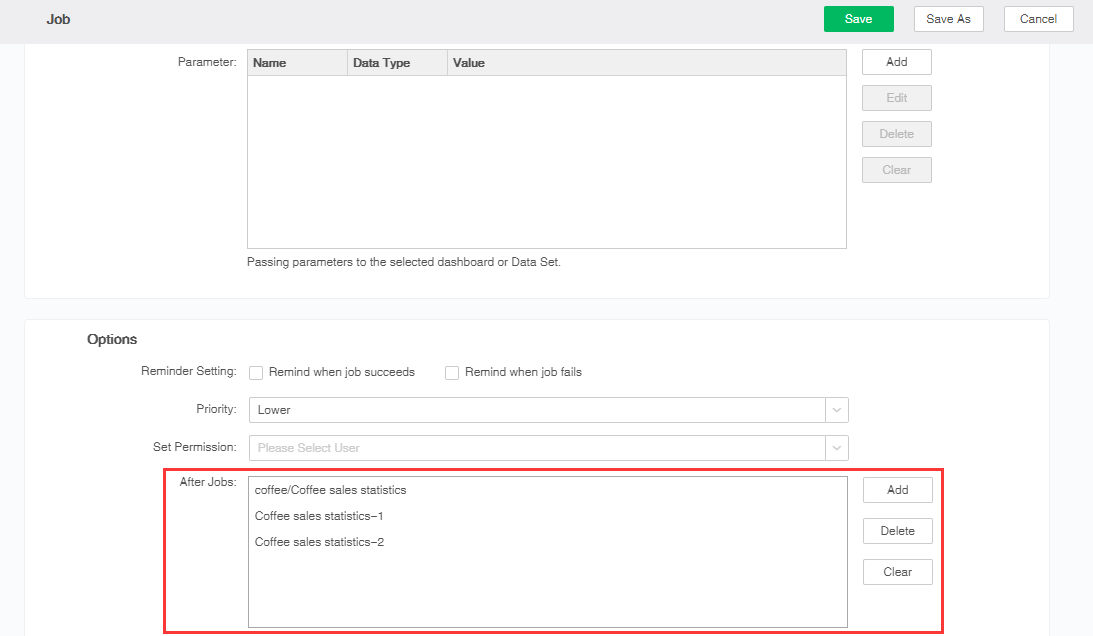
10. Set up "After job". Users can add one or more existing jobs. After the current job runs, subsequent jobs are run. Multiple subsequent jobs are run in parallel, and failure of one of the subsequent jobs does not affect the operation of other jobs.
11. Save the job. After the job is set up, click "Save". You can also click "Save As" to save the current job as another job. If you do not need to save, click "Cancel".
