|
<< Click to Display Table of Contents >> Add and Config VooltDB |
  
|
|
<< Click to Display Table of Contents >> Add and Config VooltDB |
  
|
Log in to the yonghong BI system as the admin user or the admin role user, open the management system page, and click the VooltDB management tab.
Click the Node Management-Node Management tab on the left to open the VooltDB Node Management page. On the node management page, you can manage and edit VooltDB node information.
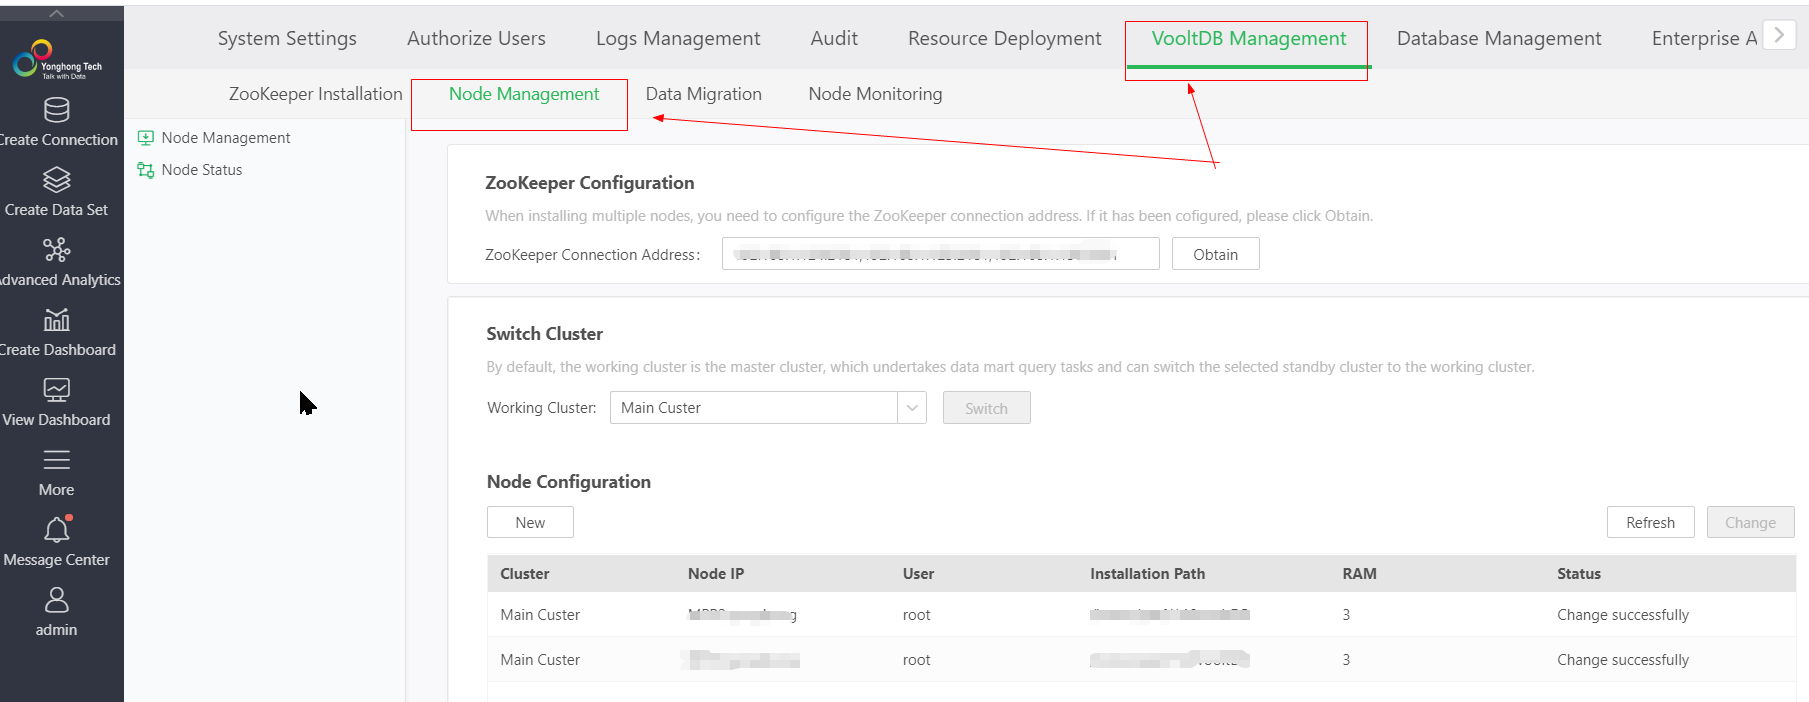
If you do not have an environment where VooltDB is installed, you can click the Add button VooltDB node on the node management page.

After clicking the Add button, the new dialog page will open, and fill in the node information in the dialog according to the actual situation.
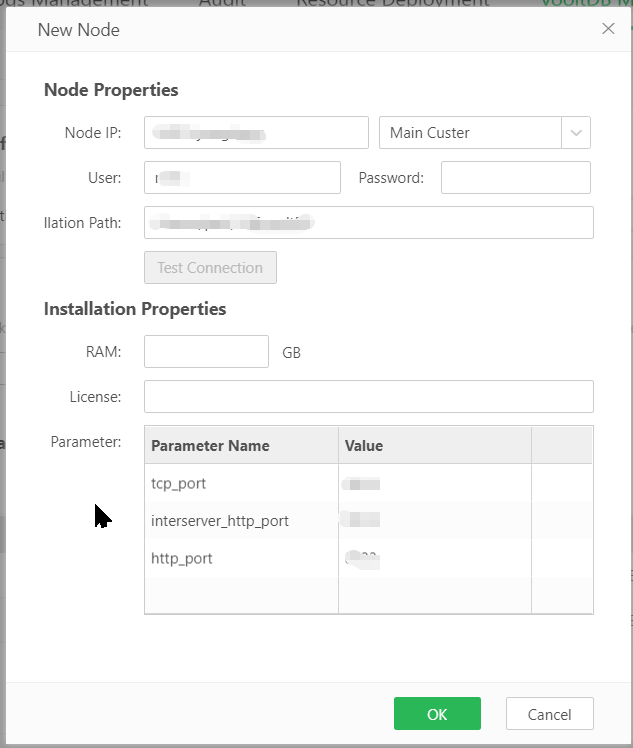
Next, we will introduce the content of each configuration item:
Configuration item |
content |
Node IP |
Fill in the server IP where you want to install the vooltDB node, or you can fill in the domain name. |
Cluster options |
Select whether the node belongs to the primary cluster or the standby cluster. This option can be selected only when the node has the function of active / standby switching. Refer to chapter: active / standby switching |
Number of backups |
When you select to install the standby cluster node, the backup number option appears. The default value is 2, which means that the number of data backups on the standby node is 2, which can be modified to 1 |
User |
The username used to install the VooltDB node. |
Password |
The user password used to install the VooltDB node. |
allation Path |
The server path where the VooltDB node is installed. If the path does not exist, the path will be created. If there is content under the path, all the original content will be deleted. |
RAM |
The maximum memory space allocated to VooltDB after installing VooltDB. After clicking test connection, it will be automatically filled in according to the current remaining memory, and it can be manually modified according to the actual plan. If it is a cluster deployment, two instances of each server share the allocated memory equally. |
License |
The license required for installation and operation of the VooltDB node can be applied for according to the business process. |
tcp_port |
Configure the port of VooltDB node for tcp communication. |
interserver_http_port |
Configure the port of the VooltDB node for interserver_http communication. |
http_port |
Configure the port of the VooltDB node for http communication. |
When configuring the port information, you need to pay attention, and it cannot conflict with the occupied port on the server.
The button functions of the new page are introduced below:
[Test connection] After filling in the node ip, user name, password, and installation path, you can click the test connection button to test whether you can successfully connect to the server. If the information is correct, the test will be displayed.
[OK] After filling in all the information, click OK to save the node information and close the dialog. If there are errors in the server information, the corresponding error message will be displayed on the dialog.
[Cancel] Click the cancel button to close the dialog without saving the filled information.
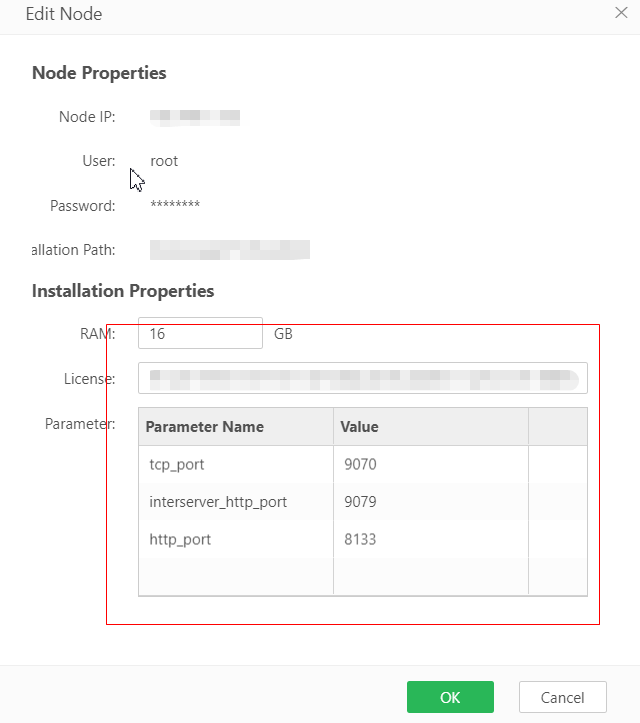
When the VooltDB node is added, you can click the edit button and the delete button to edit and delete the added node.
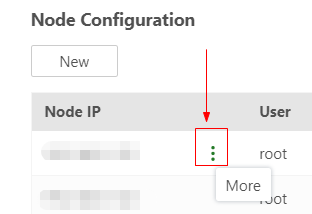
After clicking the more button, the edit and delete buttons are displayed:
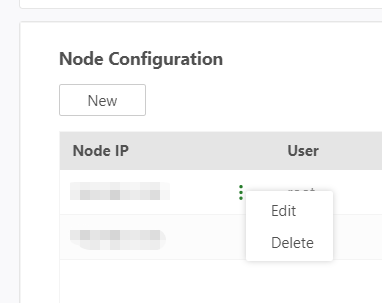
It should be noted that editing the node can only modify the content in the installation properties, and the basic information such as the ip of the node cannot be modified. If you want to change the basic information of the node, you can only delete the node.
