|
<< Click to Display Table of Contents >> Create Custom Applications in DingDing Background |
  
|
|
<< Click to Display Table of Contents >> Create Custom Applications in DingDing Background |
  
|
1.Log in to DingDing developer platform using the administrator account.(https://open-dev.dingtalk.com/)
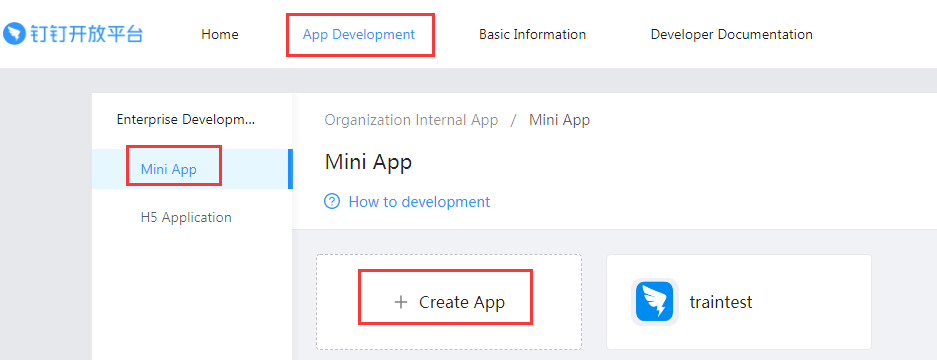
2.In the top navigation to enter the application development, choose the left navigation: App Development - Mini App, click Create App.

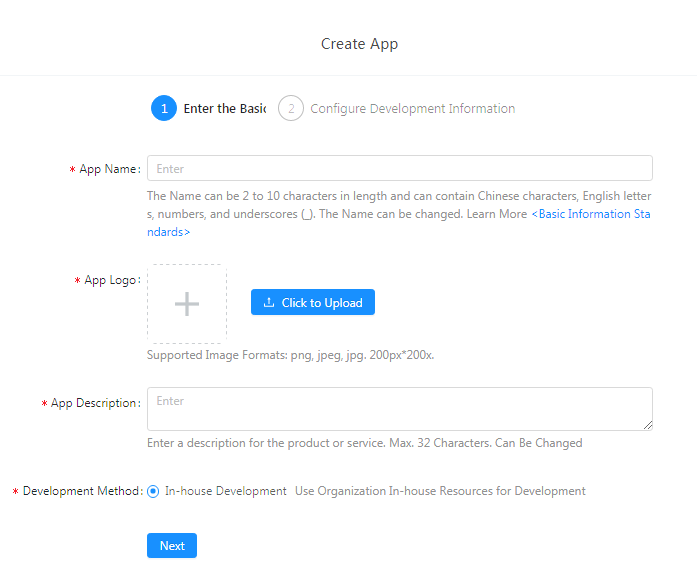
3.Fill in the basic application information as required, including App name, App logo, App Description, internal independent development of enterprise development mode, development mode and development type of E application.The server IP is the IP of the enterprise public network. After all the information is filled in correctly, the creation is completed and the application information page is entered.

4.Click "Member Settings" and add developer as per actual.

5.Click Security to add server IP to webview secure domain.
Note: both "HTTP Security Domain Name" and "Webview Security Domain Name" need to be added.

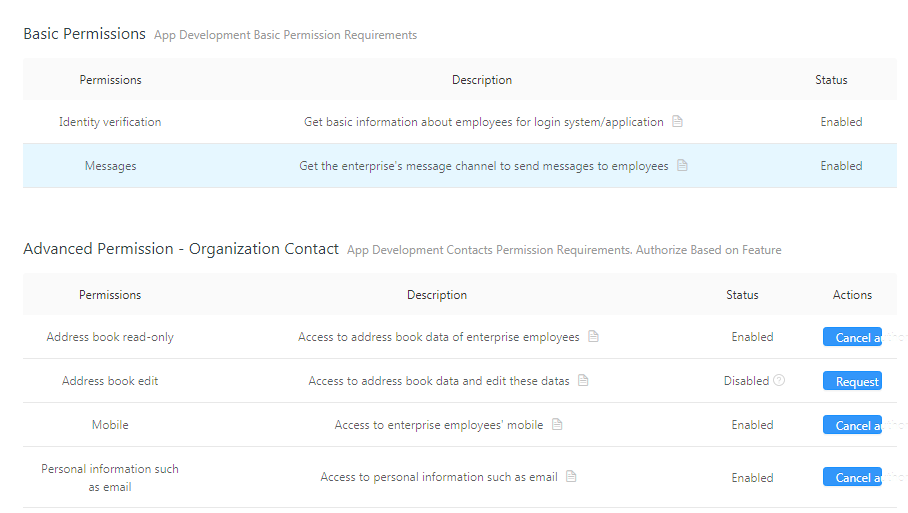
6.Click the interface permission to open the permissions of "address book read-only", "Mobile ", "Personal information such as email", "Identity verification" and "Messages " of the application.

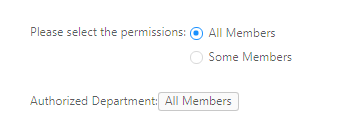
7.Find the scope of authority at the bottom of the interface permission page, configure the application scope to be all members or some members according to the actual situation, and the developer can only manage users within the scope of authority (including pulling address book).

8.Download and use DingDing developer tool to upload the downloaded applications in yonghong, see section "Download-DingDing-Application-And-Upload-It".
9.Click on version management, find the development version at the bottom of the page, and click publish.

➢Note: In version management, the application scope is configured for all employees, some employees or administrators according to the actual situation. Only the authorized users can use the application.