|
<< Click to Display Table of Contents >> Excel Data Set Page |
  
|
|
<< Click to Display Table of Contents >> Excel Data Set Page |
  
|
❖Uploading an Excel File

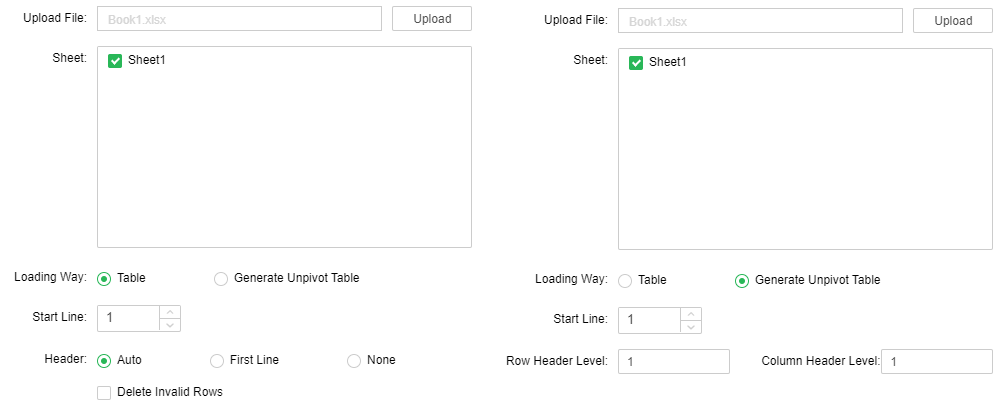
[Upload] Click upload to pop up a dialog box, so as to choose a file to be uploaded. Note: This item in the Yonghong Desktop version is called "open".
[Upload File] Refers to the name of the uploaded file. Note: This item in the Yonghong Desktop version is called "Open File".
[Sheet] List all the names of the sheets in the Excel file. The first sheet is selected by default. One or multiple sheets can be selected as required. If multiple sheets are selected, the number and data types of columns in the first sheet are treated as the basis. If the number of columns in another sheet does not match the number of columns in the first sheet, the Excel file cannot be uploaded. If the data types of columns in another sheet does not match the data types of columns in the first sheet, the data types of the first sheet are displayed.
[Loading Way]Select the way to load data, use the file data directly or convert the file column data to line data
[Start Line]The number of rows to read the data from. The default is 1.
[Header] It divides into Auto, First Line and None. Auto: The system determines the header line automatically. First Line: The first line of each sheet is considered as the header line. None: No sheet has a header line and all content in the sheets are processed as data.
[Generate Unpivot Table] Use a crossing table with row header and column header to generate a normal table with only row header.
[Row Header Level] Number of row header in the table uploaded.
[Column Header Level] Number of column header in the table uploaded.
[Delete Invalid Rows] No data is deleted by default when an Excel file is being uploaded. If you select "Delete Invalid Rows", the system will delete invalid rows automatically. For example, if nine of the ten pieces of data in a row are null, this row will be deleted automatically.
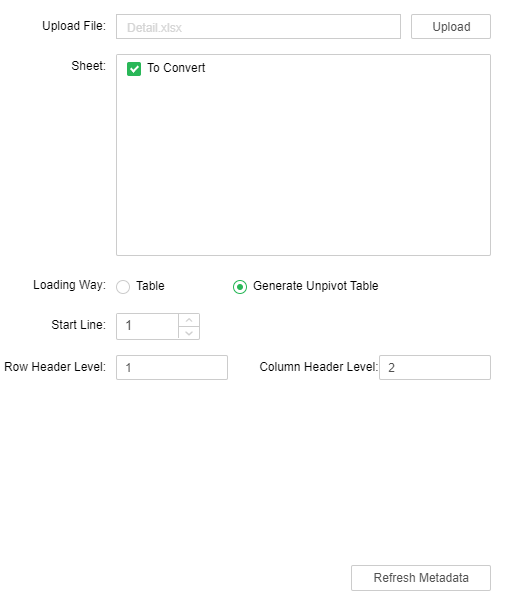
[Refresh Metadata] Click to refresh metadata, the uploaded file's data is refreshed, and then click preview data set to preview.
•Example of Generating Unpivot Table
1) Suppose there is a pivot on which the number of row headers is 1 and the number of column headers is 2, as shown in the following figure.

2) Upload the Excel file, select "Generate Unpivot Table", and set "Row Header Level" to "1" and "Column Header Level" to "2."

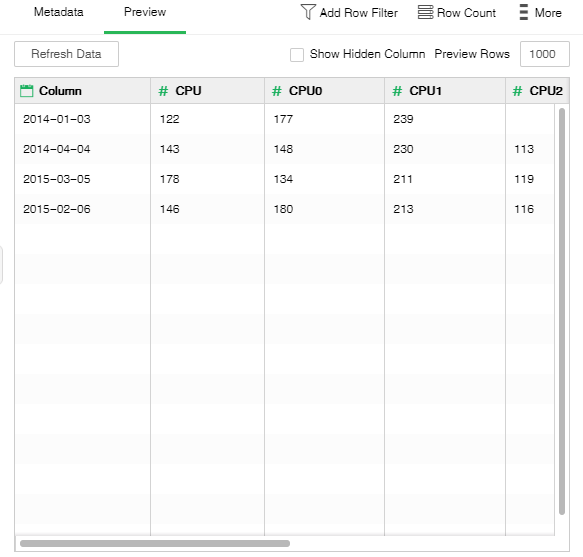
3) Refresh Metadata to process the data in the table. To be specific, take the data of the row header and the data of the two column headers as columns, and list the data in the sequence from top to bottom, from left to right, and corresponding the row header and column header. The data when previewing the data set is:

❖Uploading a CSV File

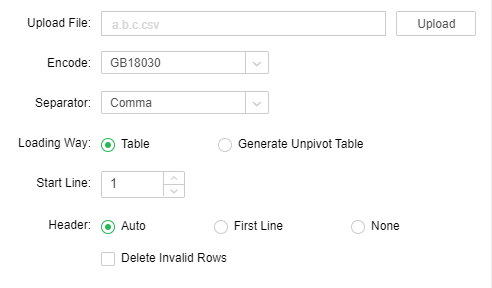
[Encode] When you select a file to upload, the system will automatically load the corresponding encoding type, or you can also customize according to needs.
[Separator] The system automatically detect the separator. You can also select the separator through the combo box. The optional separator types include: Comma, Space, Tab, Semicolon, Vertical viegule or Custom. When selecting Custom, users can input the required separator.
The other functions are the same as those for uploading an Excel file. See "Uploading an Excel File" for details.
➢Note: The page for uploading a TXT or LOG file is the same as the page for uploading a CSV file.
❖Excel automatic update
The desktop version supports automatic updating of Excel files, that is, after uploading Excel and CSV row data, the data set is saved. When the data of the local Excel and CSV files is added, deleted or modified, the Excel dataset in the desktop version automatically updates the data.
Note: Only Desktop supports Excel automatic updates. Z-Suit, X-Suite, Y-Reporting, and Y-Vivid show do not have this feature.