|
<< Click to Display Table of Contents >> Create Composed Data Set |
  
|
|
<< Click to Display Table of Contents >> Create Composed Data Set |
  
|
1) Click the quick start shortcut of Yonghong Z-Suite.
2) Open the browser and enter http://hostname:8080/bi/Viewer in the address bar to log in to the client. The hostname here refers to the IP address of your PC. For local visit, you can use localhost. 8080 is the default port number. If the default port number is changed during installation, type in the correct port number.
3) Enter username and password and then log in the homepage.
4) Click "Create Data Set" to enter the page for creating a data set.Click on the "Composed Data Set" option on the page to open the Composed Data Set interface.
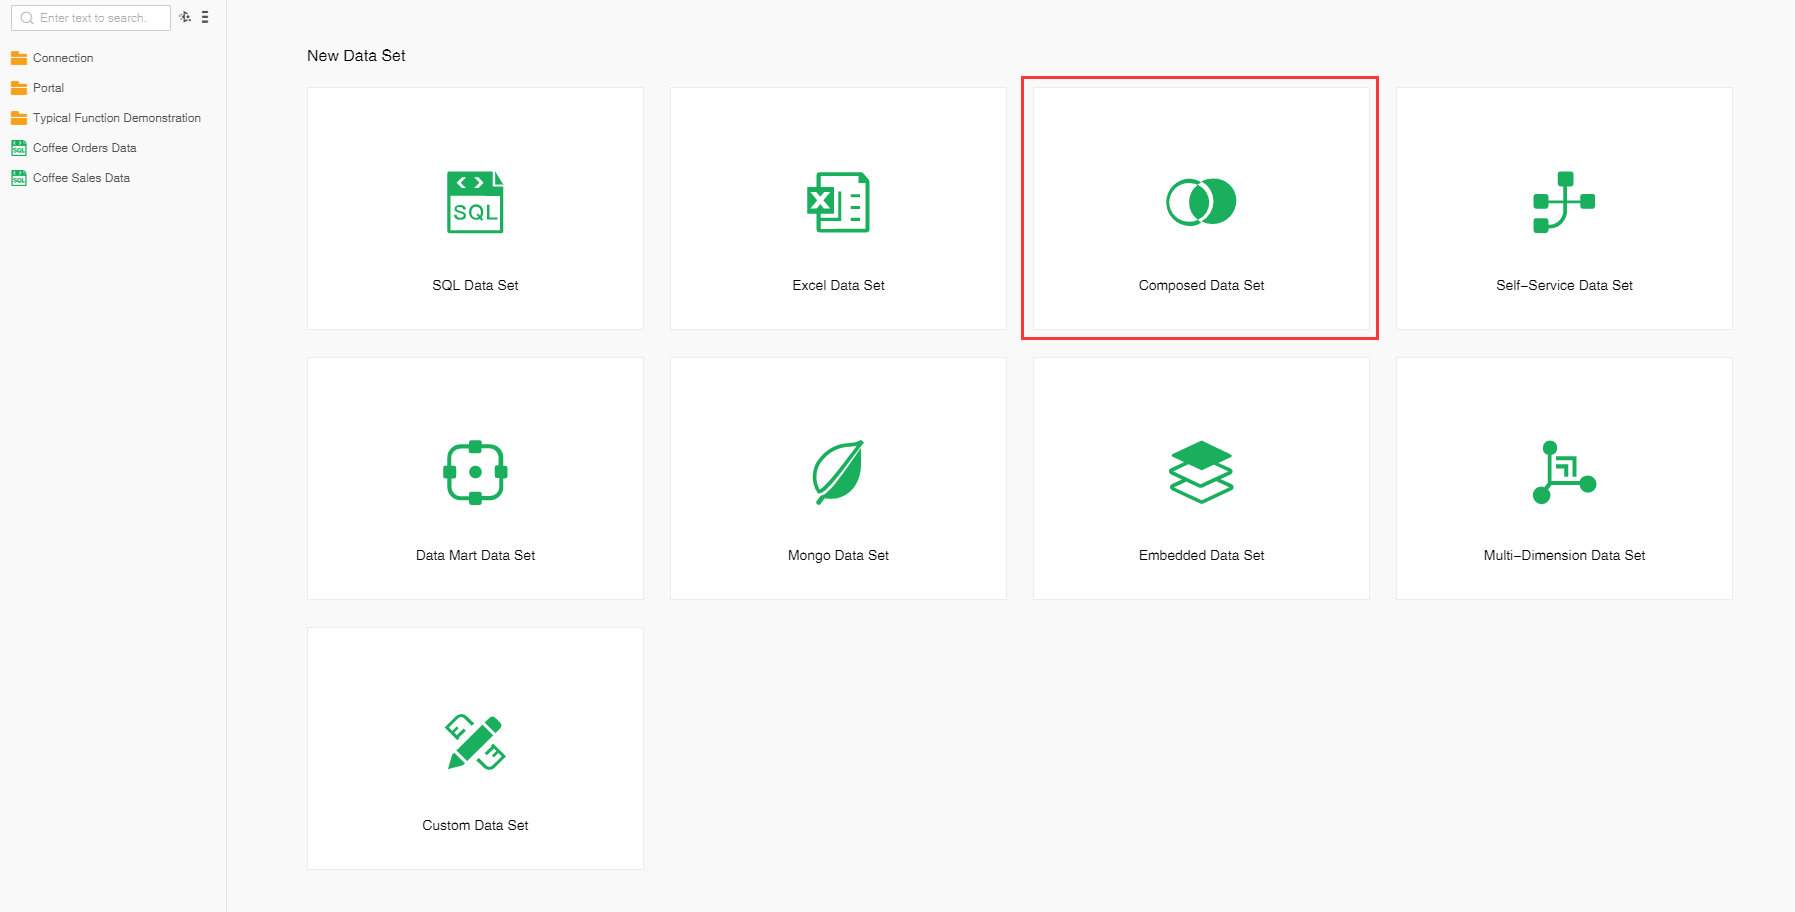
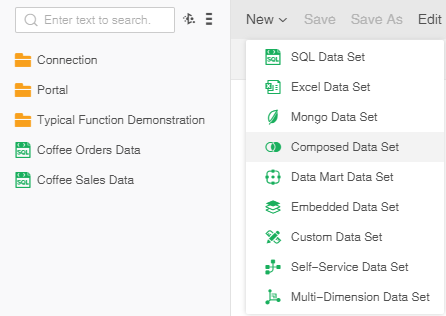
5) On the data set page, click "New" on the menu bar and select "Composed Data Set" to open the composite data set page.
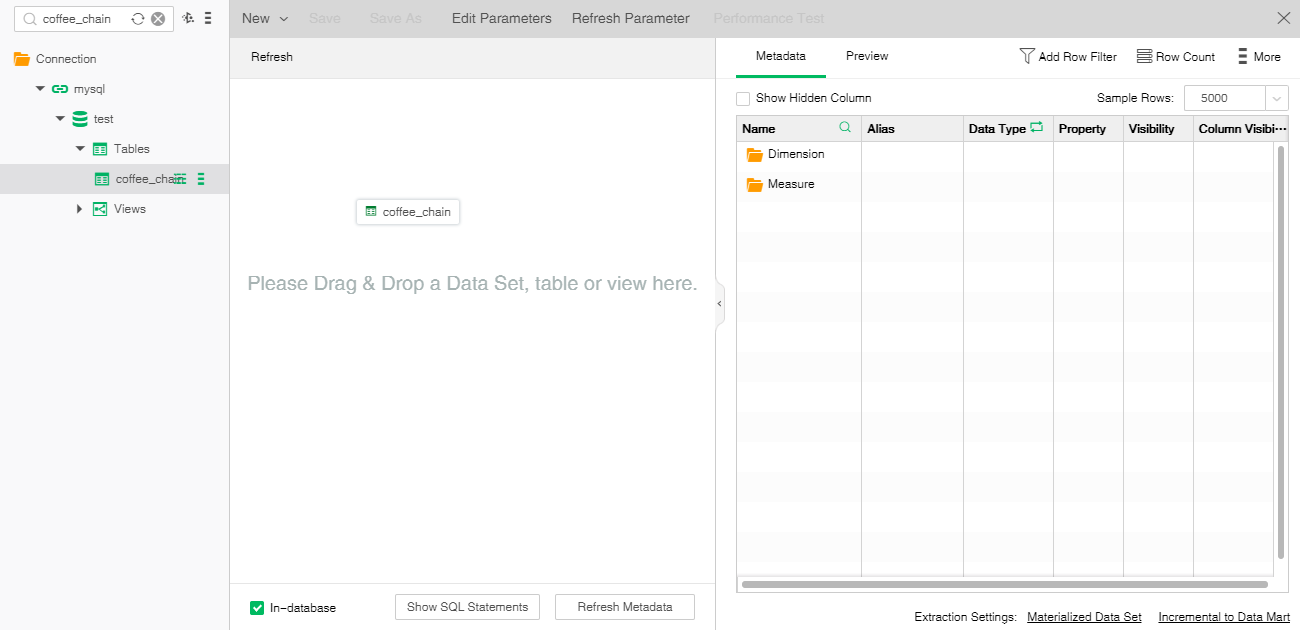
Composed Data Set can directly drag a data set from the left data set asset tree to the edit area of Composed Data Set; you can also drag and drop the tables or views in the data source to the edit area of Composed Data Set. After a data set, table, or view is dragged to Composed Data Set, they are all called as "table" in this document.
❖Adding Data Set
Drag a data set from the asset tree on the left to the edit area of Composed Data Set. Any type of data set can be added. Composed Data Set cannot have only a table, which comes from the data set.
➢Note : Not supported Self-Service Data Set.
❖Adding Table or View from Database
Expand the data source's table and view nodes, drag a table or a view to the edit area of Composed Data Set. Composed Data Set can have only a table, which comes from the table or view.
❖Adding Area
If a table is inserted into a blank Composed Data Set, the table can be put in the upper-left corner of the edit area of Composed Data Set in DND mode.
If other tables are already in the edit area of Composed Data Set, you can add the newly added table to:
•·Before the first table
•·Between two tables
•·After the last table
•·On the existing table
•·Replace the old table if the other blank area is added to the existing table.
Insert after the last table if added to other blank area. The picture below is a screenshot of adding between two tables, with bold blue lines indicating that the area can be inserted:
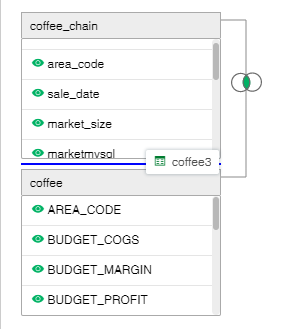
If outer join has been defined between two tables, then drag table in database.after dragging the two tables into Composed Data Set, the default connection can be added based on these outer join without being specified by the user.
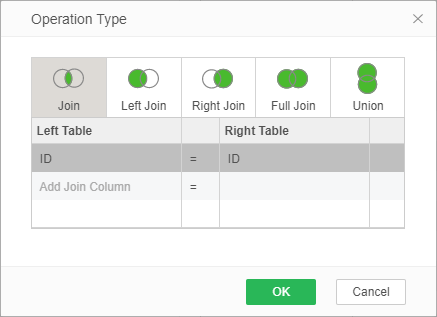
You can click the icon on the connection line between tables to open the "Operation Type" dialog and define the join relationship between the two tables.
The relation diagram between two tables is as follows:
Relationship |
Icon |
|---|---|
Join |
|
Left Join |
|
Right Join |
|
Full Join |
|
Union |
|
Invalid Join |
|
❖Join
Join types:
Join: Inner join the records in the left and right tables complying with the join conditions.
Left Join: Display all the records on the left table and only the records that comply with join conditions on the right table. The records not complying with join conditions on the right table are displayed as vacant.
Right Join: Display all the records on the right table and only the records that comply with join conditions on the left table. The records not complying with join conditions on the left table are displayed as vacant.
Full Join: Display the records on both the right and left tables. For the records on the left table that do not comply with join conditions, the corresponding positions on the right table are displayed as vacant. For the records on the right table that do not comply with join conditions, the corresponding positions on the left table are displayed as vacant.
Join condition:
In "Operation Type" dialog, click "Add Join Column" to define the conditions for joining the left and right tables. Select the data type matching column from the left and right tables as the join condition column. Several conditions can be defined between two tables.
Invalid join: When no join condition is defined between two tables, or when the join condition is invalid, the join is invalid.
❖Union
Union All: Union the data (including duplicate data lines) of the two tables. The data on the left table is above the data on the right table. The table column name after union is the column name on the left table.
Invalid join: The two tables union must have the same number of columns in the table, and the data types of the corresponding columns must match. If the above two conditions are not satisfied, union is invalid.
The newly inserted table finds the previous table of insertion point to create join relationship by default. If there is no previous table, then the next table of the insertion point will be connected. You can also drag the connection line to reconnect the left and right tables.
Move the cursor to a connection line and drag the line upwards or downwards to another table.

When the connection line is green, you can release the mouse. As shown in the following figure:
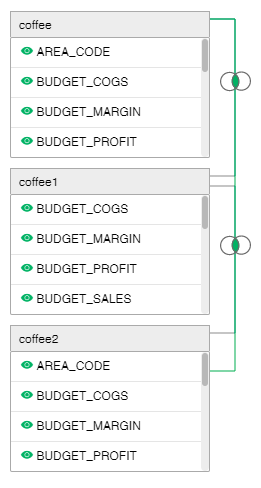
In Composed Data Set, any table must be related with any other table. The number of connection lines is the number of tables minus 1. When dragging the connection line leads to no relationship between a table and other tables, the color of the connection line will be displayed red, indicating illegal dragging of connection line.
❖Moving Table
Select the table header part and drag the table to a new location. You can insert before another table, or attach to another table, or you can move to another table to replace it.
❖Editing a Table
Tables in Composed Data Set can define filter condition, hide columns, change column's sequence and change the table size.
Define filter: Click Filter icon in table header to open Filter dialog and add filter conditions.
Hiding columns: To show/hide a column, click Visibility icon before the column name. The header the table provides the function of showing/hiding all columns.
Change column sequence: Drag the column to the front or back of another column to change the sequence of columns. The hide column is always in the last place.
Change the size of table: Drag the bottom edge of the table to change the height of this table; drag the right edge of the table to change the width of all the tables in the same column.
❖Delete Table
To delete a table, click "Delete Data Set" icon on the table header.
❖Show SQL Statements
To view the SQL statements generated by Composed Data Set, click "Show SQL Statements" under Composed Data Set edit area.
❖Refresh Metadata
The refresh metadata button is grayed out by default. The user has to drag at least two data sets before the button becomes green and clickable.
When the green refresh button is clicked, the button turns white.If you do anything to the child nodes, the button turns green.
❖Save&Save As
If the refresh button is white, the composed data set can only be saved successfully.