|
<< Click to Display Table of Contents >> Users Batch Import |
  
|
|
<< Click to Display Table of Contents >> Users Batch Import |
  
|
Users outside the system supports batch import into Yonghong. There are two import methods: Excel import and data set import. Excel batch import: upload users in the Excel file to Yonghong. Data set batch import: Users in a SQL data set or Excel data set are uploaded to Yonghong.
Only the users of admin or admin_role can see the option of batch import after logging in.
Batch import users: Open the "More" drop-down menu on Authorize Users-User Management page, as shown below:
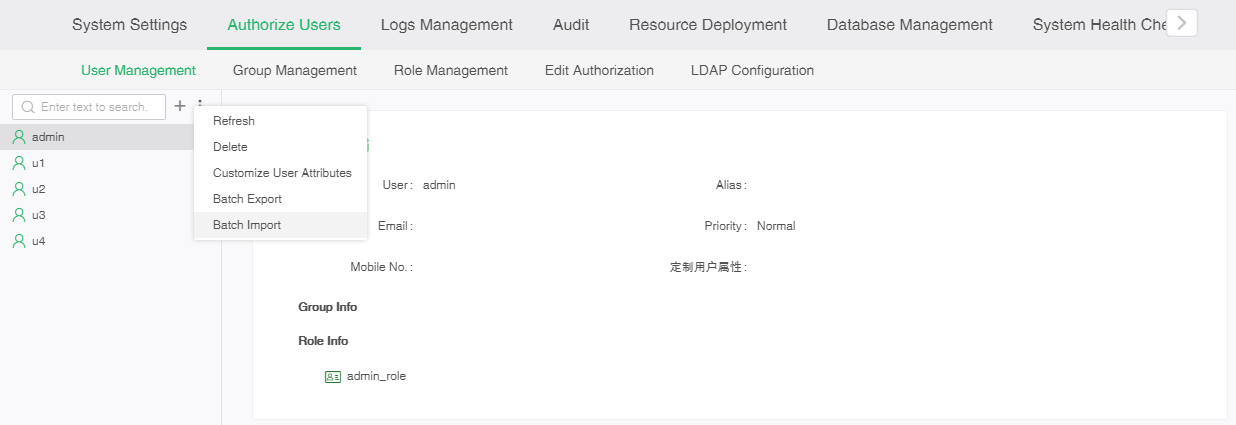
Click "Batch Import" to pop up the batch import dialog box. The default displayed interface is "Excel Batch" as shown below:
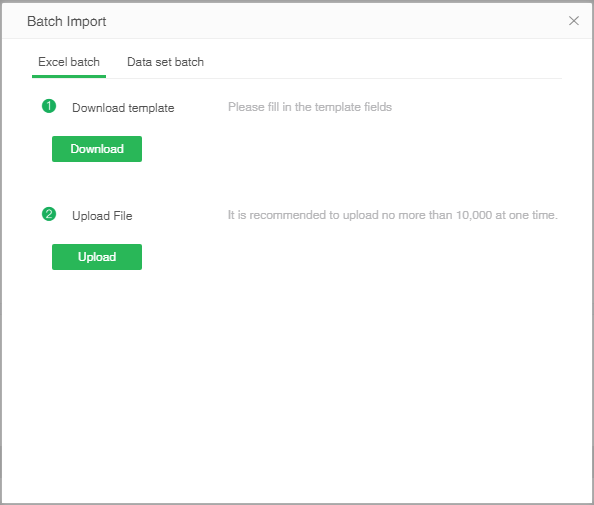
❖Excel batch
Steps of import users in Excel:
Download template
1. Click the "Download" button, the browser will pop up a download window, select the storage location and click "Save" to download the template to the local, the downloaded template is shown below:
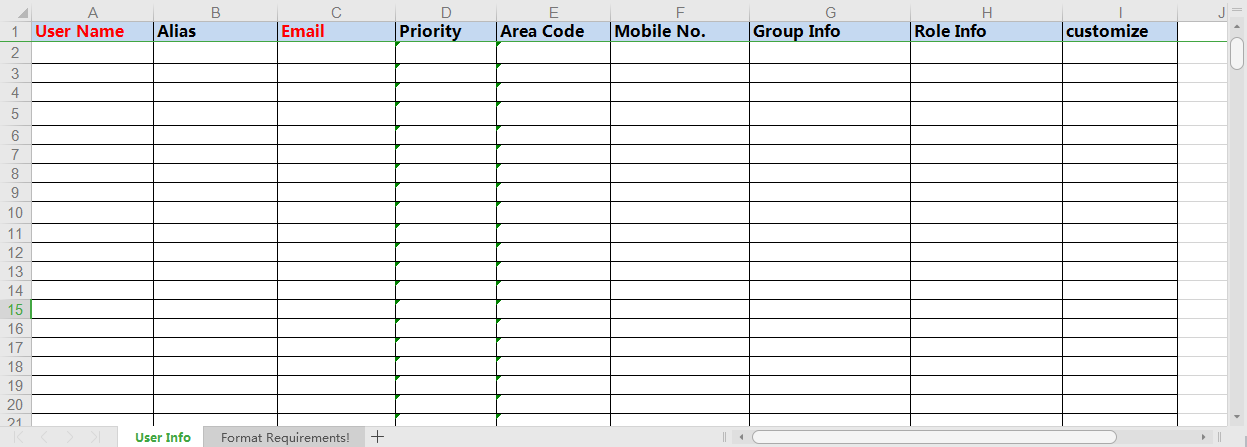
Click on the "format requirements!" sheet page to see the format requirements for adding user information, and the requirements are as follows:
•User name, Alias: Special characters are not supported.
•Priority: Select from the drop-down list.
•Area code: Select from the drop-down list.
•Mobile No.: 5-20 digits.
•Group Info: (The groups structure will be displayed according to the groups hierarchy after import)
(1) Parent group / child group / child child group.
(2) If the user belongs to multiple groups, each two groups should be separated by English semicolons. For example, parent group / child group; parent group / child group.
•Role Info: If the user has multiple roles, each two roles should be separated by English semicolons. For example, Role 1; Role 2.
➢Notes:
•You cannot change the template format, and you cannot add columns at will. For example, when there are custom user attributes in the product, you need to export the custom user attribute columns through the export template. The custom user attribute columns you add in Excel would be ignored.
•Columns in red are required. When the property prompt.weak.pwd is true, the header of the mailbox column is displayed in red, that means the value is required. When the property prompt.weak.pwd is false, the title of the column of the mailbox is displayed in black, that means the email of the user is not required.
•The template provides 200 rows by default, beyond which you need to copy the cell format.
•When the value of a user attribute in excel is blank, the value of the corresponding user attribute in Yonghong will not be overwritten after uploading; when the value of a user attribute in excel is not blank, the value of the corresponding user attribute in Yonghong will be overwritten by the value in Excel after uploading;
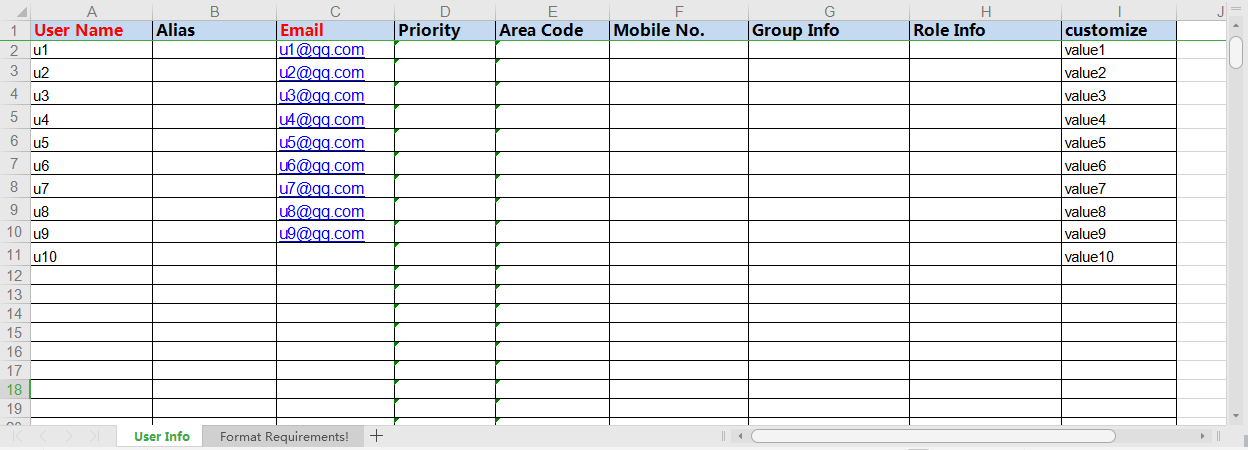
2. Add users according to the template format, as shown below:
3. Upload the Excel file.
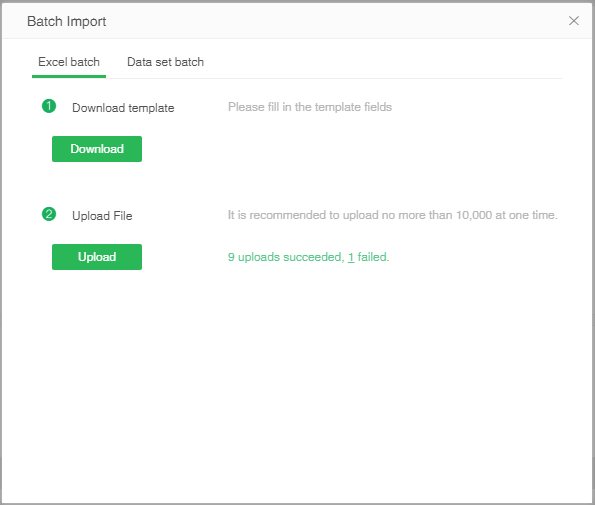
Click the "Upload" button, select the file to upload, and click the "Open" button to upload. As shown below:
4. Upload failed error message
After uploading, the upload result will be displayed in the dialog box, and the prompt message is: upload success ×× bars, failure ×× bars After clicking the number of failed items, the browser pops up the download window, and you can download the error message. Open it after downloading, as shown below:
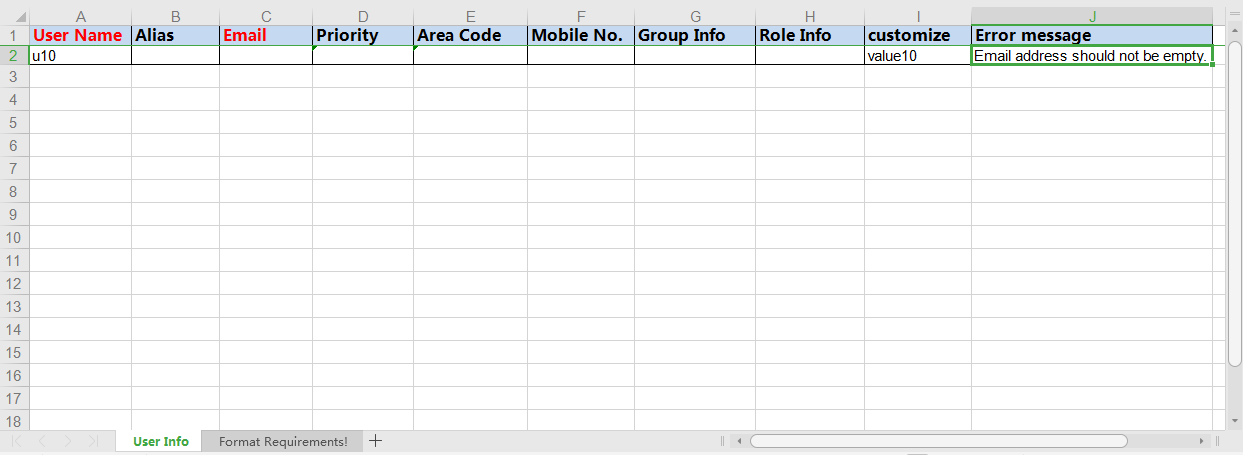
The last column: The error message column will list the reason why the corresponding user failed to upload.
5. Results after upload
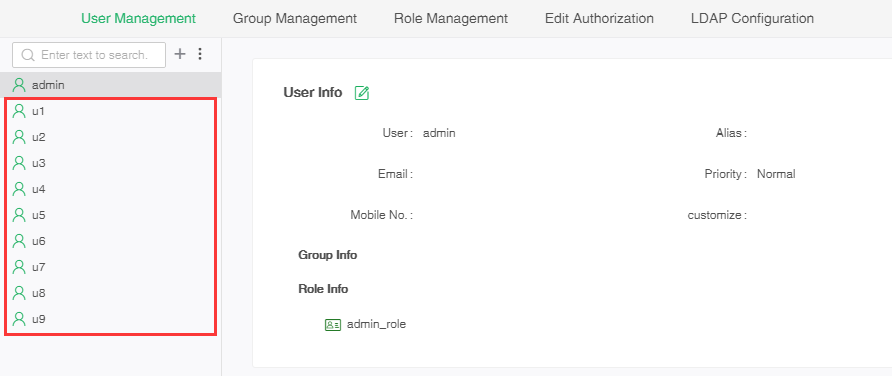
The uploaded users will be displayed on the left user list, as shown below:
❖Data set batch
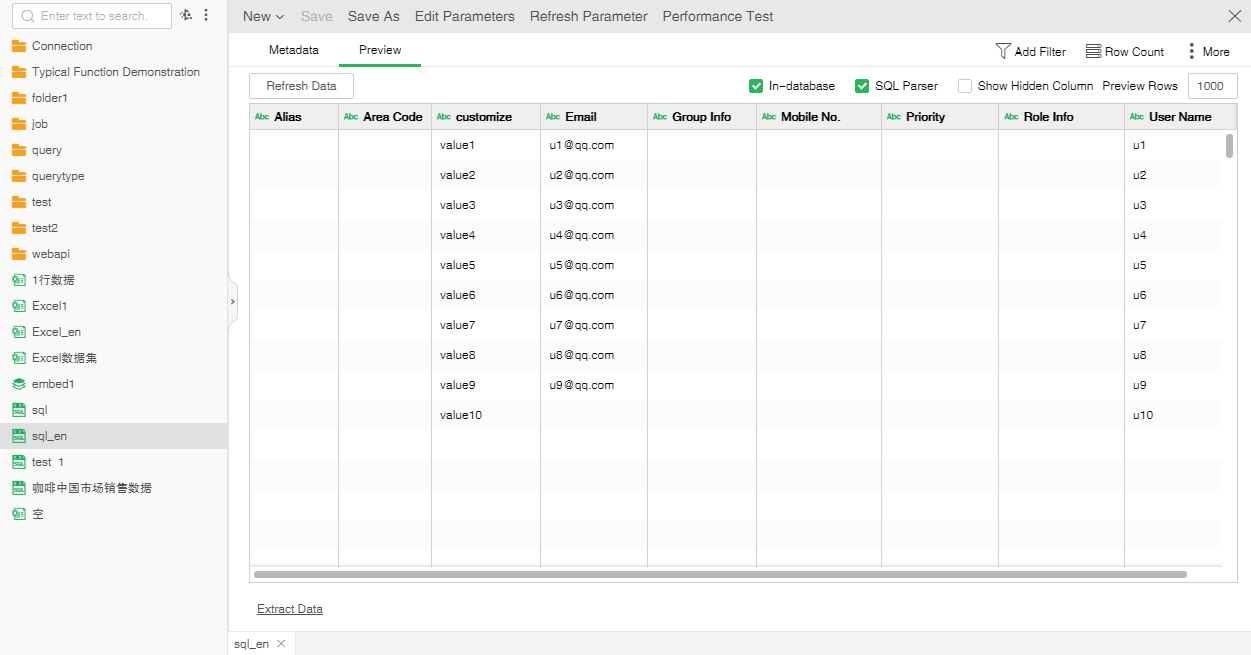
The batch import of data sets supports the import of Excel data sets and SQL data sets. The following example introduces batch import of SQL data sets.
Suppose there is a SQL data set like that in the following picture.
The data set batch import interface is as follows:
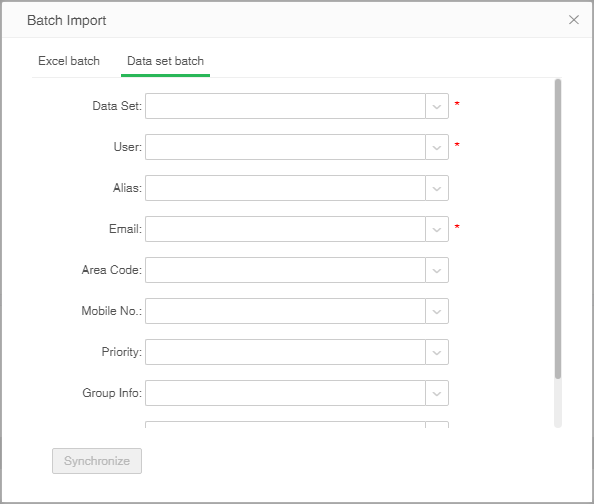
【Data Set】Required. The drop-down menu displays all Excel data sets and SQL data sets in the product. The user can select the data set to be uploaded.
【User 】 Required. Select the column in the data set to match the user's user name, and import the corresponding content as the user name.
【Alias】 Select the column in the data set to match the user's alias, and import the corresponding content as the alias.
【Email】 Select the column in the data set to match the user's mailbox, and import the corresponding content as the mailbox. Email is required by default. When the mailbox is required, you must select the corresponding match before importing.
【Area Code】 Select the column in the data set to match the user's area code, and import the corresponding content as the area code. If the area code is not filled in, the default value is: China + 86.
【Mobile No.】 Select column in the data set to match the user's mobile phone number, and import the corresponding content as the mobile phone number.
【Priority】 Select the column in the data set to match the user's priority, and import the corresponding content as the priority. When the priority is not filled, the default value is: Medium
【Group Info】 Select the column in the data set to match the user's group, and import the corresponding content as the group.
【Role Info】 Select the column in the data set to match the role of the user, and import the corresponding content as the role.
➢note:
•When there is a custom user attribute in the system, this dialog box will add a custom user attribute option below the role information. If the custom user attribute has a default value and the custom user attribute is not filled, the default value of the custom user attribute will be automatically used.
•When there is no matching column selected for the required items, the "Synchronize" button is unavailable. After all the required items are matched, synchronization can be performed.
•For not required attribute, if no matching column is selected, the content of the corresponding column in the data set will not be uploaded to the product.
•When no matching item is selected for the user's attribute, such as alias, no matter whether the alias of the user in the data set has a value or not, it will not be uploaded to the product; when matching item is selected for the user's attribute, such as alias, if the value of the alias of the user in the data set is empty, it will not be uploaded to the product. If the value of the user's alias in the data set is not empty, after uploading, the value of the user alias in the data set will be uploaded to the product and the value in the product will be overwritten.
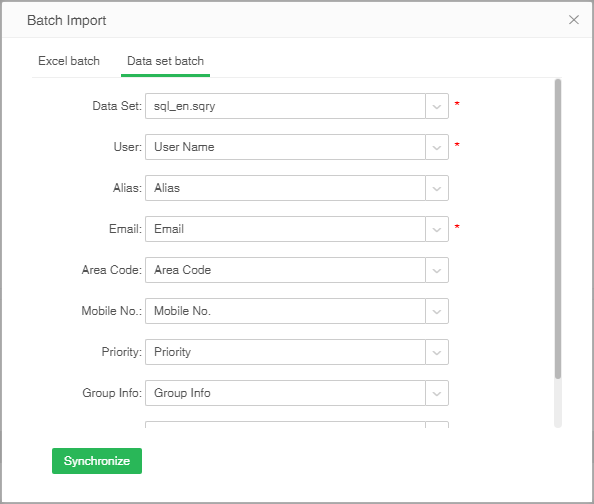
The interface after selecting matching columns is shown in the following figure:
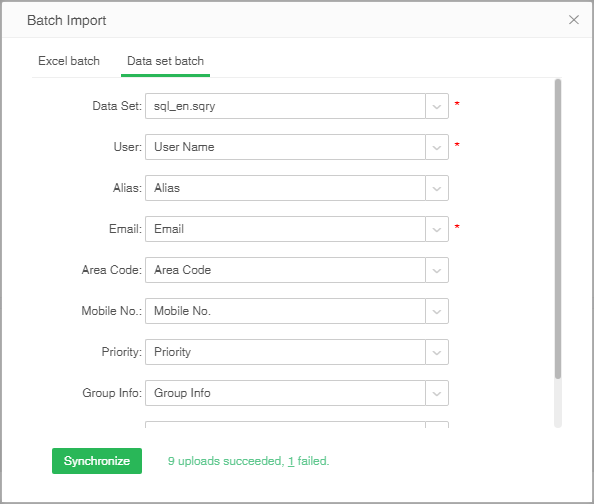
After uploading, the upload result is shown as below:
The uploaded user list is shown as below:

Click the number of failures to download the list of failed upload error messages , which is introduced in the previous content Excel Batch.