|
<< Click to Display Table of Contents >> Deployment in WebLogic |
  
|
|
<< Click to Display Table of Contents >> Deployment in WebLogic |
  
|
❖Basic environment
Windows、Linux、Unix
The WebLogic management console under Linux and Unix is the same as the interface under Windows, that is, the implementation steps are the same, so let's introduce the implementation under the Windows system.
❖Deployment step
The following instance environment is windows 10 + WebLogic 10 + JDK 1.6
1.Start the server, open the WebLogic management console, the default address is http://localhost:7001/console, select the left deployment menu, click the right Install button to deploy.

2.Click the "Install" button in the deployment interface.

3.Change the path to the location of bi.war in the installation package, select bi.war, and click next.
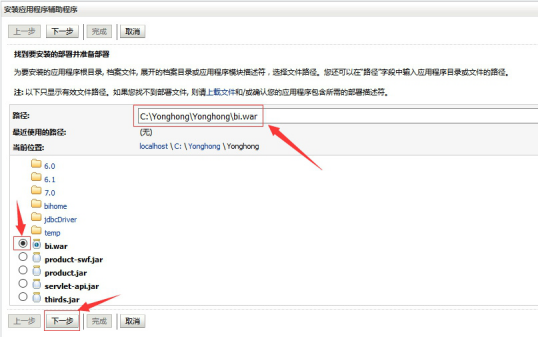
4.Click on the next step.

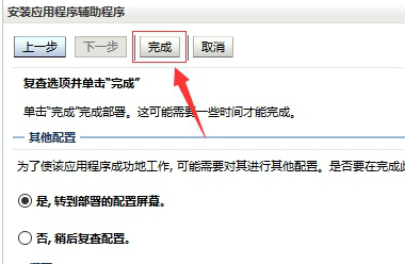
5.Click "finish" and end the deployment.
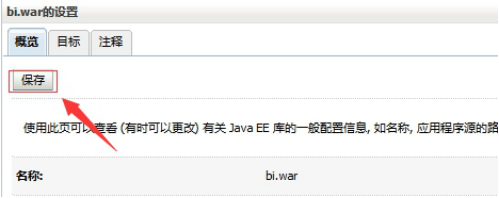
6.After the completion, click "save".
7.After saving success, click on the left "deploy"
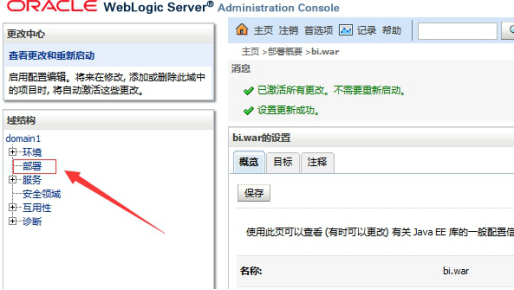
8.Select bi.war and click "start".
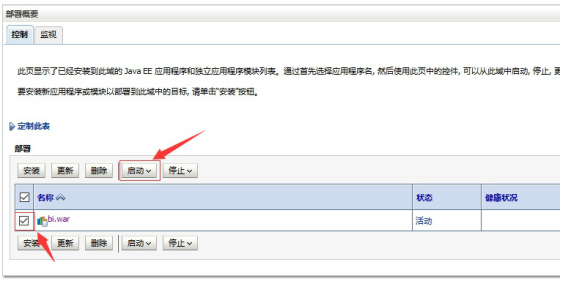
9.After startup, you can visit http://localhost:7001/bi/Viewer to visit Yonghong product interface.
➢Note: WebLogic supports WebSocket version: 12.1.3. Yonghong 7 APP needs to be used in version WebLogic 12.1.3 and above.