|
<< Click to Display Table of Contents >> Fill in the Data |
  
|
|
<< Click to Display Table of Contents >> Fill in the Data |
  
|
In View Dashboard module, you can perform "update data", "delete row", "insert row above", "insert row below" and other operations on the form parameter component. This chapter introduces the specific operations and response effects.
❖Operation type
For example, in View Dashboard module, open the dashboard with form parameter component (for example, the submit type of reporting is "intelligent submission", and the key column is "ID" in the figure), and operate on the form parameter component
Update data - for the data to be updated, double-click the cell, and directly change it to a new value, as shown in the following figure: change "SALES" value whose ID is 1 to 21900, and move out the cursor after modification will automatically highlight the modified row.
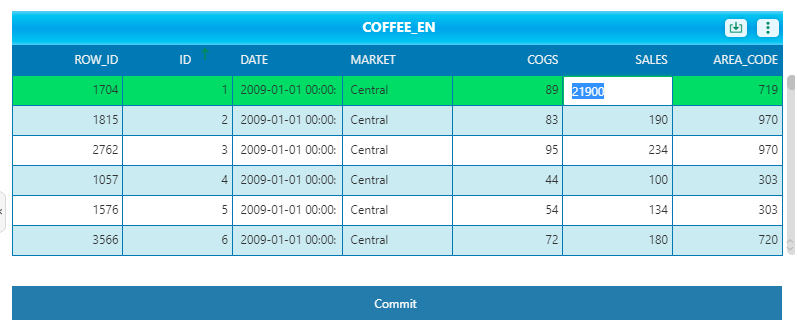
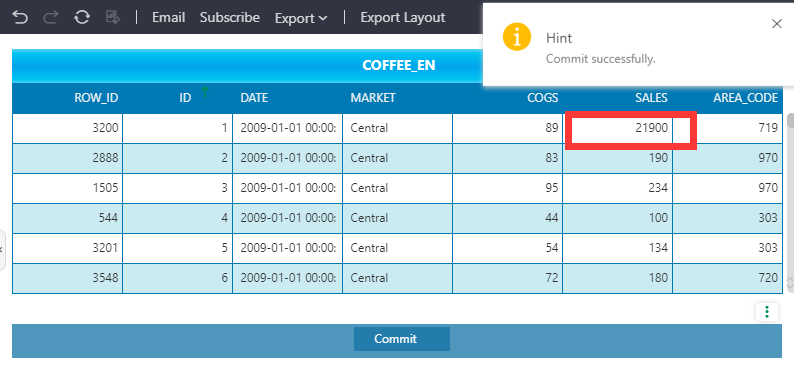
Note: after clicking commit, the target data will be modified, the effect is the same as SQL - > update table ﹣ name set sales = 21900 where id = 1. Data's modification is submitted successfully as shown below.
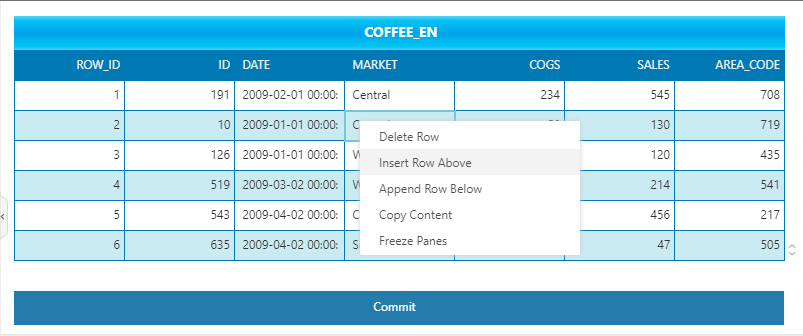
Insert data - right click the cell where you want to add a new row, and select Insert a row above here or below here. The inserted data row defaults to "gray" background:
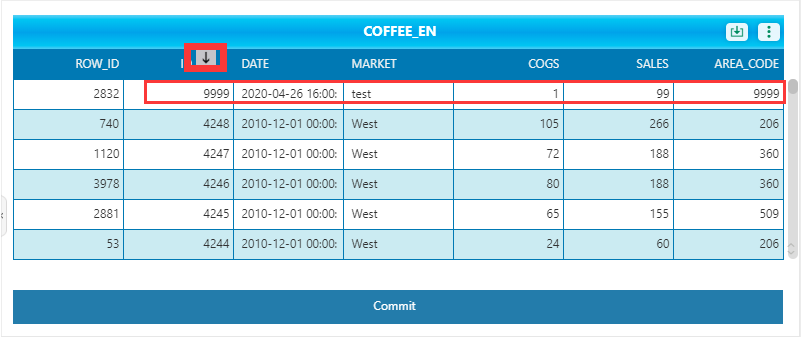
As shown in the figure: insert one row below the second row, and fill in the values successively: 9999, 2020-04-26 16:00:00, test, 1, 99, 9999
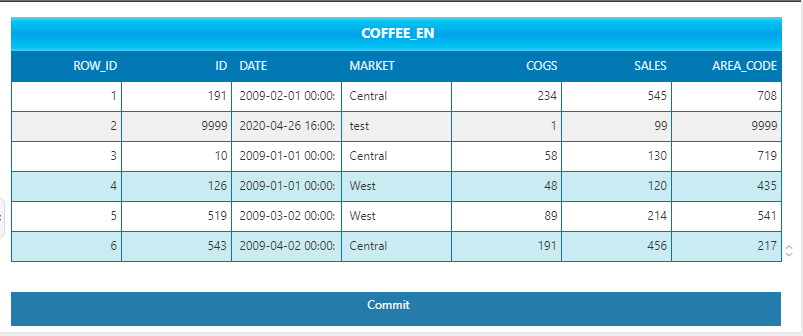
Note: after clicking commit, you can view the data just inserted through the sorting button of the header position. The effect is the same as that of SQL - > insert into table Gu name (field1, field2,... Fieldn) values (value1, Value2,... Valuen). The successful data update is as the figure below.
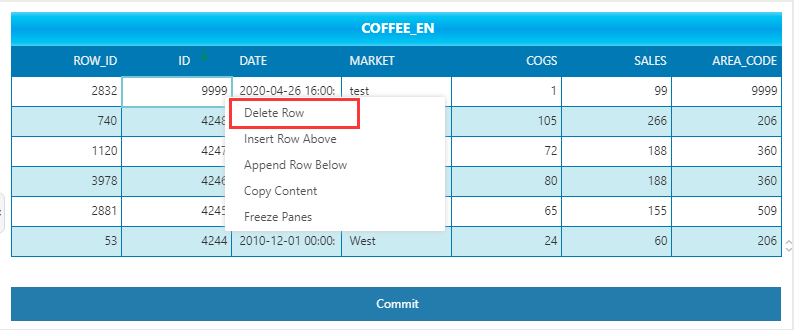
Delete data - right click the data to be deleted and select delete row, as shown in the figure, delete the data with order id = 9999:
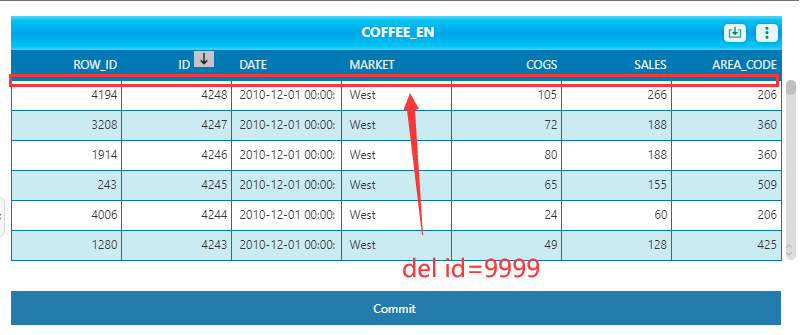
Note: after clicking commit, the data whose id is 9999 will be deleted, the effect is the same as SQL - > delete from table ﹣ name where id = 9999; after data update, the effect is as the figure below:
❖Import Excel Data
The function of importing Excel data is a unique function of form parameter component. When viewing a dashboard, click the icon in the upper right corner of the header of form parameter component to open the dialog of importing Excel data, which supports importing excel file or CSV file. The dialog of uploading excel file is shown as follows:
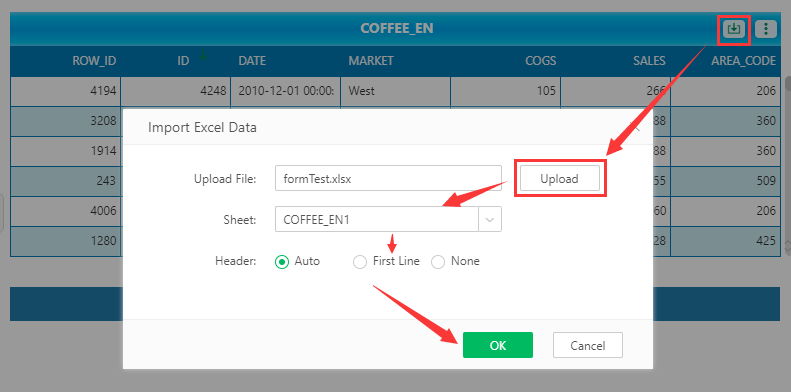
Notes:
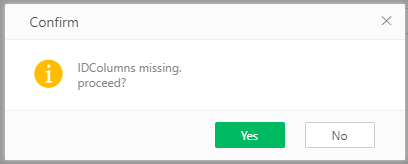
1. When importing an excel file, the data columns bound to the filling parameter component are imported based on whether the column names match. A prompt will pop up for the columns with mismatched column names or types, as shown in the figure:
2. When replacing data, the data in the Excel file is updated, inserted, and deleted based on the condition column selected in the filling parameter as the judgment basis;
•Excel header data supports matching column names, aliases, and text formats;
•If you do not check to delete all current data when updating, Excel does not have the data in the condition column. Fill in the data in the parameter component and will not delete it. When checked, the Excel data will all cover the data in the filling component data;
•If both the filling parameter component and the Excel file exist, update the data in this row;
•If the parameter component does not exist, insert the row of data when it exists in the Excel file;
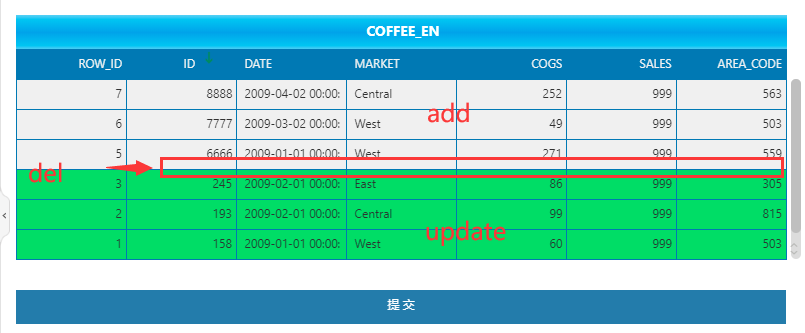
3. If the excel file is imported several times in a row, the initial binding data of the form parameter component will be used as the benchmark for data comparison each time the file is imported.