|
<< Click to Display Table of Contents >> Fill in the Data |
  
|
|
<< Click to Display Table of Contents >> Fill in the Data |
  
|
Note: The module described in this chapter is an advanced module, and need to be purchased separately.
By filling in the form parameter component, the user can submit data to the database in preview mode or when viewing the report. The methods for filling in data include: insert, delete, and change.
❖Insert data
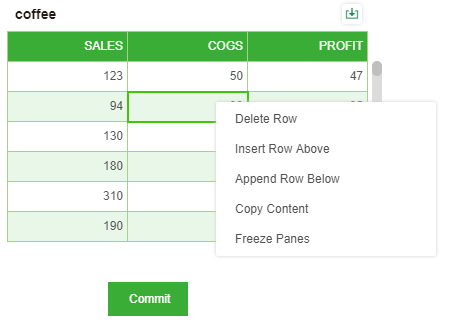
Right-click on a cell in the non-edit state and select Insert Row Above or Append Row Below, as shown:
❖Delete data
As above, right-click on a cell in the non-edit state and select Delete Row.
❖Change data
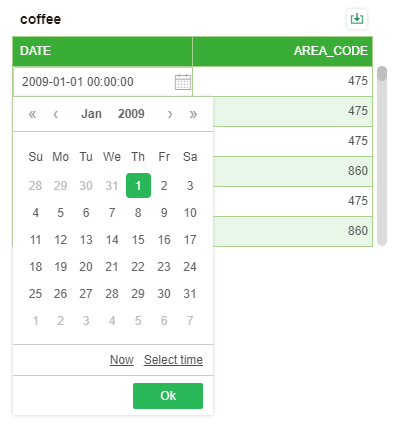
Change the data: For text, numerical data can be edited by double-clicking directly. For time data, you can also select the time by clicking the button, as shown in the following figure:
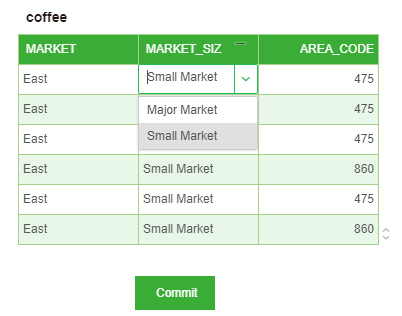
If it is a drop-down type, select the desired data through the pull-down menu. As shown below:
❖Import Excel data
Import Excel data: Click the icon on ![]() the header of the parameter component to enter the import Excel data editing interface, which supports the import of Excel files or CSV files. Upload Excel file interface as shown in the picture:
the header of the parameter component to enter the import Excel data editing interface, which supports the import of Excel files or CSV files. Upload Excel file interface as shown in the picture:
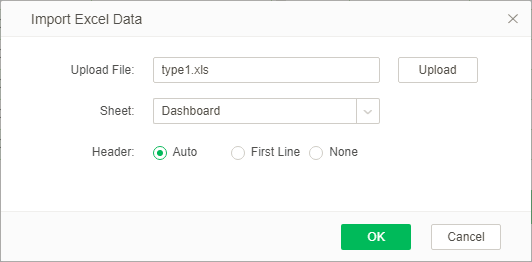
Upload CSV file interface as shown in the picture:
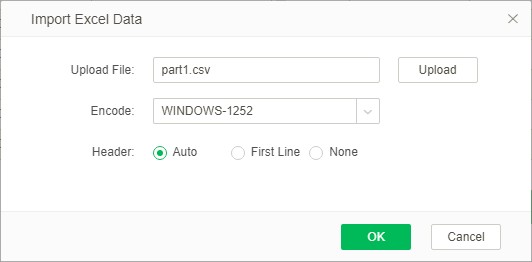
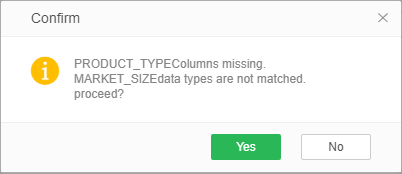
When you import an Excel file, the data column in the file and the data parameter column that is bound to the form parameter component are imported based on whether the column names match or not, and the column that does not match the column name or type will pop up.
When replacing data, the data in the Excel file is updated, inserted, or deleted according to the condition column selected in the filling parameter as the basis for the data binding of the filling parameter component: For the data in the condition column, when the parameter is filled in the parameter component If there is no Excel file, delete the data in the row. If there is both a report parameter component and an Excel file, the data in the row is updated. If there is no report parameter component, the data is inserted in the Excel file. If you import Excel files more than once, the data will be compared against the initial binding data of the parameter component when the file is imported.
➢For example:Submit an imported Excel file to a table under the mysql database.
1.Create a new form parameter component and bind the column in the query, as shown in the figure:
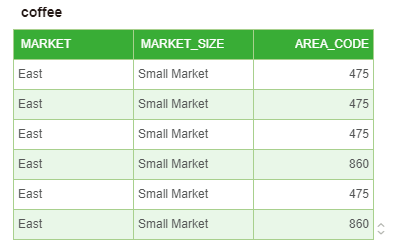
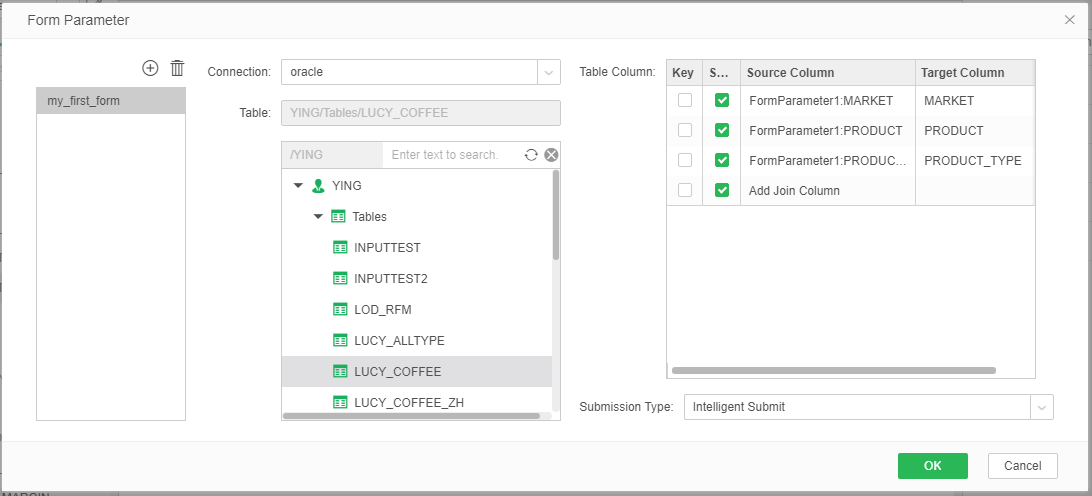
2.Select the form parameter component in the right panel click Settings - form parameter, open the report parameters window, set to: data source: mysql database, the target table is: coffee, the condition is listed as PRODUCT, submitted as all matching columns, not checked Delete all current data when updating with Excel data, as shown in the following figure:
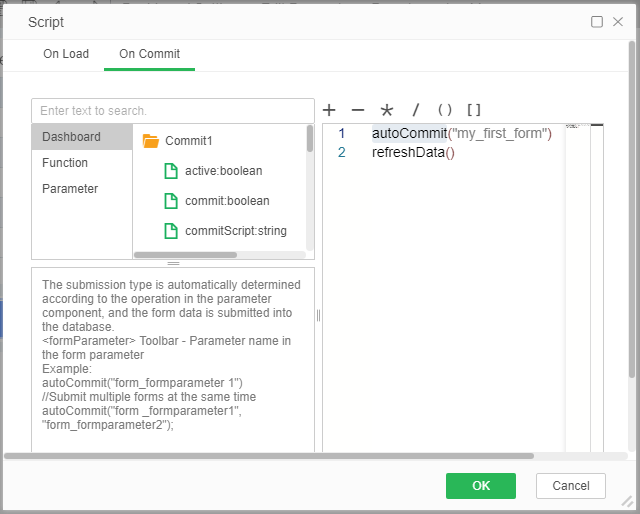
3.Create a new commit component, the right panel - set the select script - run when submitted, in the script edit box, enter: autoCommit("my_first_form"); as shown:
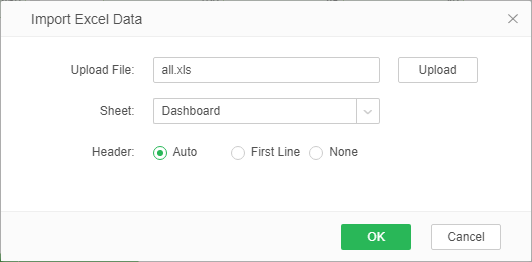
4.In the preview, click the Import Excel Data icon on the header of the parameter component to open the Import Excel data interface and upload the Excel file "all .xlsx" as shown in the figure below:
In the file "all .xlsx", there is a column that does not exist in the data that is bound to the form parameter component and the type does not match. Click OK to upload the prompt, as shown in the figure:
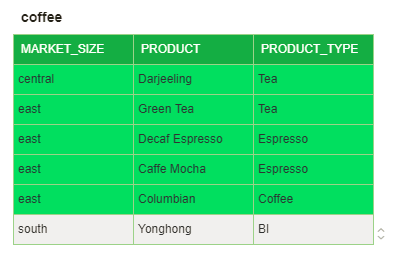
5.After the import of all .xlsx files is done in the preview - the parameter components are shown in the following image, the updated colors are shown in green, the inserted colors are shown in grey:
6.Click the commit component to submit the imported Excel file to the database.