|
<< Click to Display Table of Contents >> Add Range Filter |
  
|
|
<< Click to Display Table of Contents >> Add Range Filter |
|
Filter other components by binding data from the same data set, provided that the filtered components are the same as the data source bound to the current Range Filter.
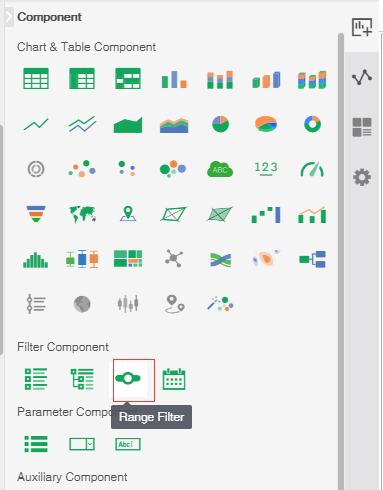
❖Create a Range Filter
Click the Range Filter button in the right panel component, drag it to the dashboard editing area by holding down the left mouse button, and create a Range Filter in the dashboard edit area.
❖Bind data source
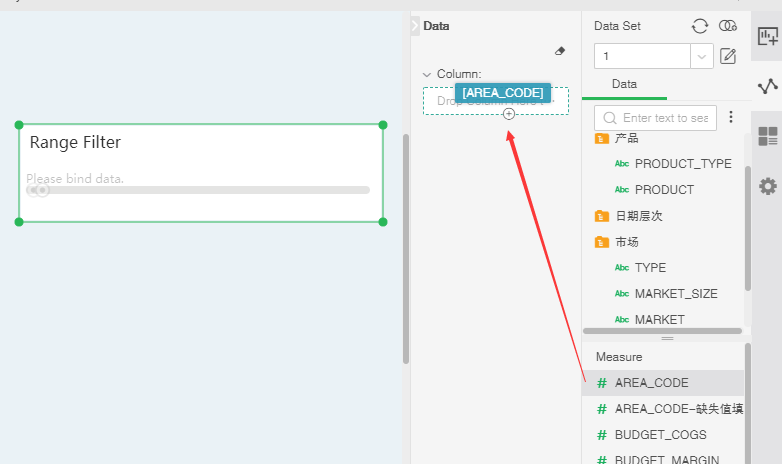
Create a Range Filter. Click the bind data icon in the hover toolbar area of the Range Filter to open the Range Filter binding interface. The bind interface contains two parts, the query tree and the Range Filter bound window. We have the following three methods to bind data segments:
•Drag and drop the data segment to bind window binding, as shown in the figure:
You can also drag the data segment to the binding window to replace the binding;
•Drag the data segment to the Range Filter to achieve binding. as the picture shows:

You can also drag and drop the data segment to the Range Filter component to replace the bound data segment.
•Double-click the data section of the query tree list to achieve binding.
❖Remove data segment
To remove the bound data segment, we have the following three methods:
•Select Delete from the drop-down list in the Bindings window.
•Drag and drop the data segment of the binding window into the query tree to achieve the removal.
•Click the Clear button.