|
<< Click to Display Table of Contents >> Email Task |
  
|
|
<< Click to Display Table of Contents >> Email Task |
  
|
Email Task:Generate PDF or Excel dashboards on a regular basis and send emails to users.
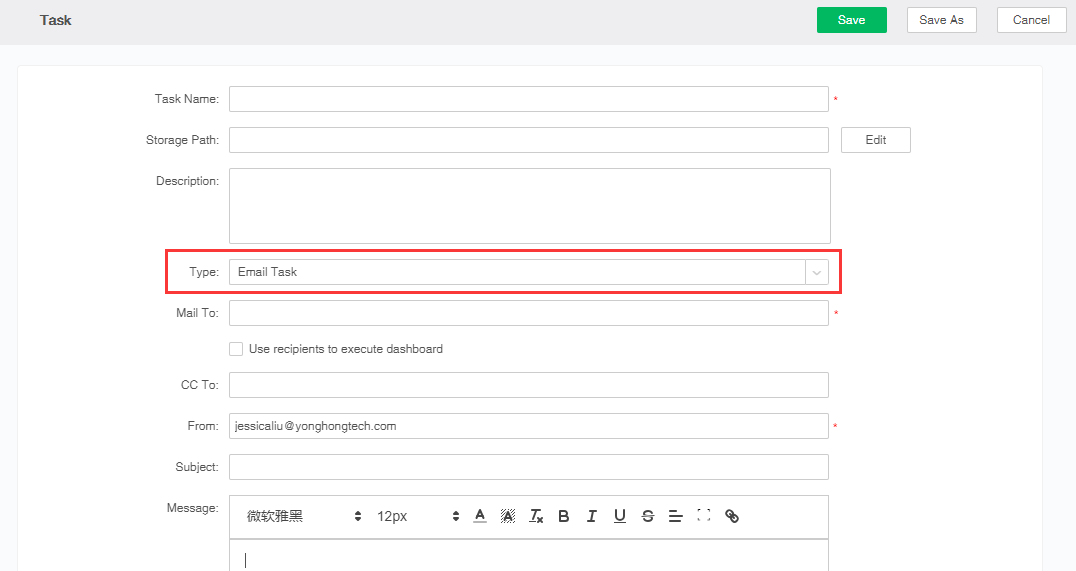
1. In the task area of the new job or the New Job interface, select the task type as "Email Task", as shown in the following figure.
2.Set up the recipient(Mail To). Users can enter email addresses, and they can add users, groups, or roles.When you click the Add button in the To field, you can open the dialog box.In the dialog box, select the desired user, group, or role to add to the recipient or carbon copy.If the user involved has configured an email address, then the email can be received. For how to configure the user's mailbox, please refer to User and Permission Management -> User Management -> Add User.
Description: Yonghong Desktop does not support setting recipients.
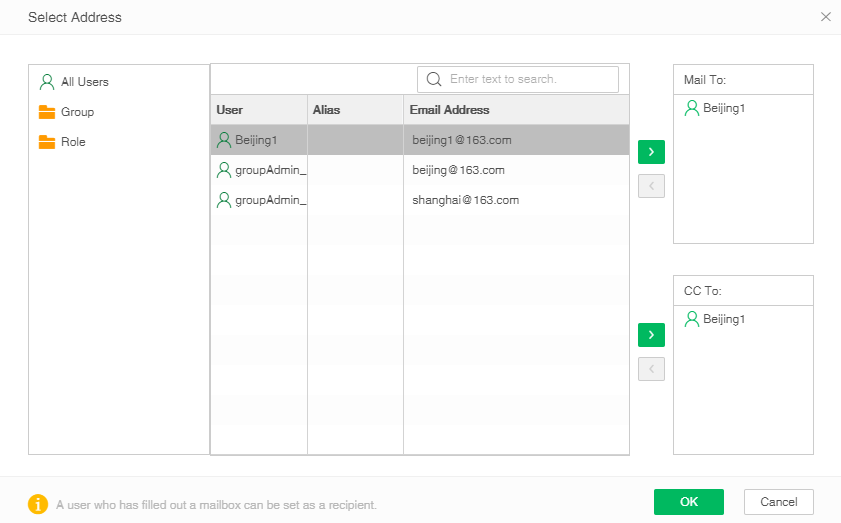
Meanwhile, the email can be only sent to the email box in a domain. The domain can be configured in bi.properties: local.mail.domin. If local.mail.domin is = yonghongtech.com, the email box 12345@qq.com will not receive an email.
3.Set the cc person. The copy person's setting method is the same as the recipient. Users can refer to step 2.Description: Yonghong Desktop does not support setting CC.
4.Set the permissions for the message. When the "Use recipients to execute dashboard" property is checked, users in the system can only receive their own information. If the recipient is not in the user of the Yonghong system, he or she receives the report person's information.
Description: Yonghong Desktop does not support setting email permissions.
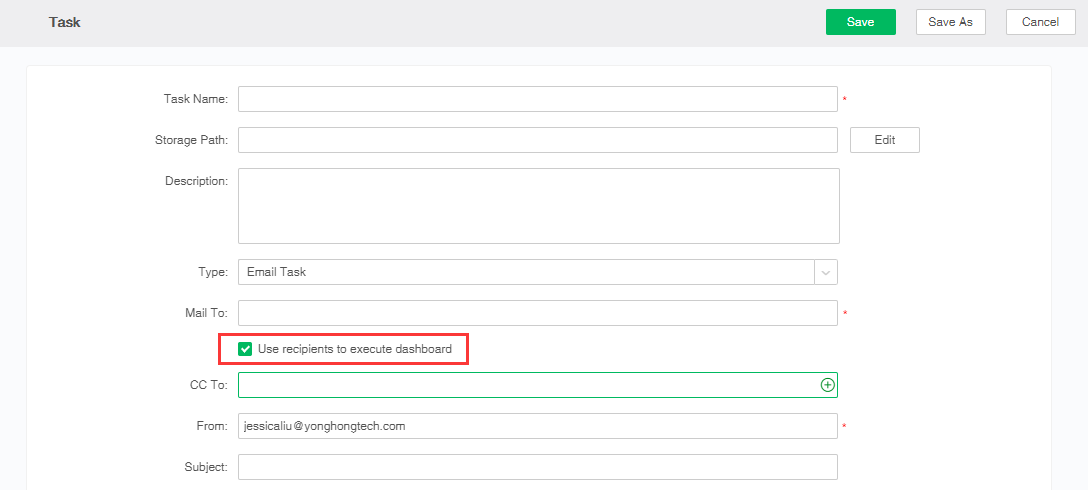
➢Description:The user can configure bi.properties: isHiddenUSU=xxx, control the display and hide of the item in the mail dialog box..Where XXX can be true or false, and the default value is false, it will not hide; When XXX =true, the item will not be displayed. When the item is hidden, it can be configured in bi.properties: USUHiddenValue=xxx. Control whether to execute the dashboard via the recipient's permission. Where XXX can be true or false. The default value is false. Do not execute the dashboard via the recipient's permission; in case of xxx=true, execute the dashboard via the recipient's permission.
5.Set sender(From). The mailbox configured in the current login user's personalization is displayed by default. For the configuration method of personalized mailbox, please refer to Preference->Other configuration.
6.Set the email subject and body content. The text edit box supports rich text editing. Not only can the text be font, font size, font color, background color settings, but also can set local bold, tilt, add underline, strikethrough, subscript operations. In addition, the text entered by the user can be left-right aligned and centered. Supports hyperlinks and full-screen operation. Default configuration format "This message is from:? {_USER_}".
➢Description: The theme, message and file name support the parameters: ?{_TO_USER_},?{_THIS_YEAR_}, ?{_THIS_MONTH_}, ?{_THIS_DAY_}, ?{_THIS_FULL_DAY_}。?{_TO_USER_} Display the user name;? {_THIS_YEAR_}, ?{_THIS_MONTH_}, ?{_THIS_DAY_}, ?{_THIS_FULL_DAY_} Show the current time.

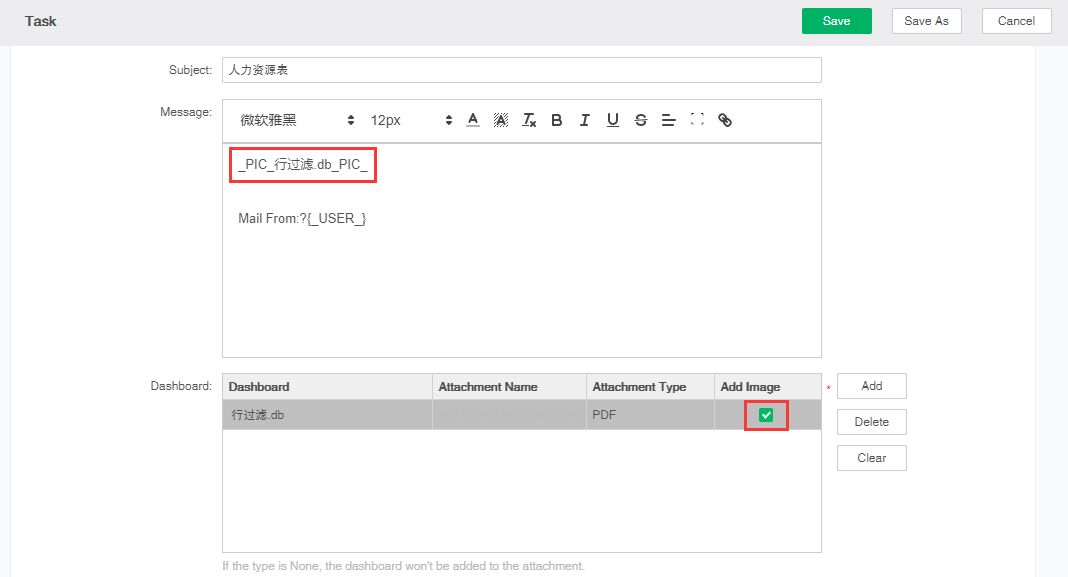
7.Add a dashboard to your email. The user clicks "Add" to select one or more dashboards to be sent in the existing dashboard, as shown in the figure below.
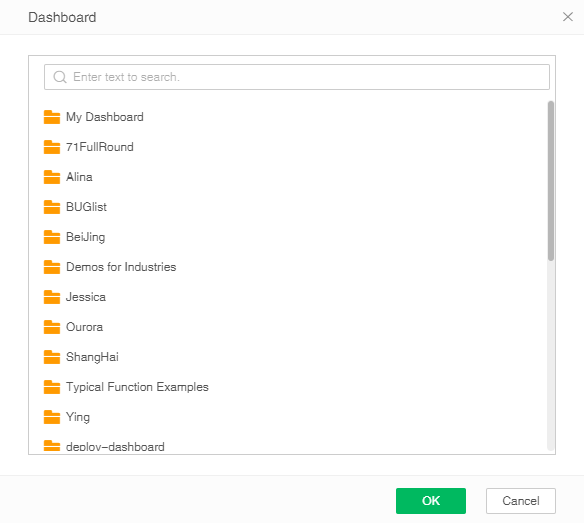
8.After the dashboard is added successfully, the dashboard area will display the relevant information of the dashboard, including the dashboard, attachment name, and attachment type. Attachment types include No attachment, PDF and EXCEL, and the default is PDF. When “No attachment” is selected as the attachment type, the dashboard will not be added to the email attachment. when the attachment type selects “PDF” or “EXCEL”, the corresponding attachment type will be added to the email attachment. When "Add Image" is checked, a placeholder for the picture appears in the message edit box, indicating the position of the picture in the text. When the recipient receives the email, he sees a static picture of the dashboard in the body of the message.
The user can also delete the selected dashboard through the "Delete" button, or clear all added dashboards via the "Empty" button.
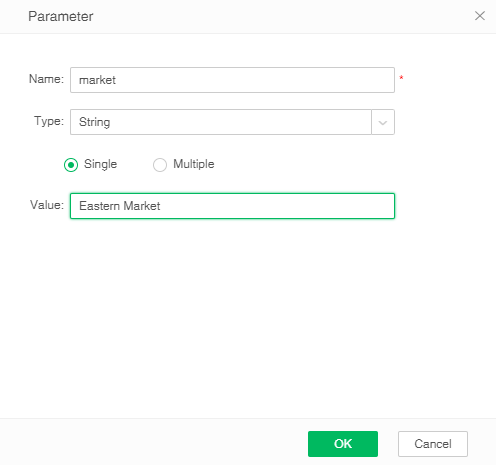
9.Setting parameters. The user clicks the Collect button to collect all the parameters in the currently selected dashboard or dataset, including the name of the parameter (required), the parameter data type, and the parameter value. When the user needs to add a parameter, click the Add button to pop up the parameter dialog box. The user can set the name of the parameter, the data type of the parameter, and the parameter value.
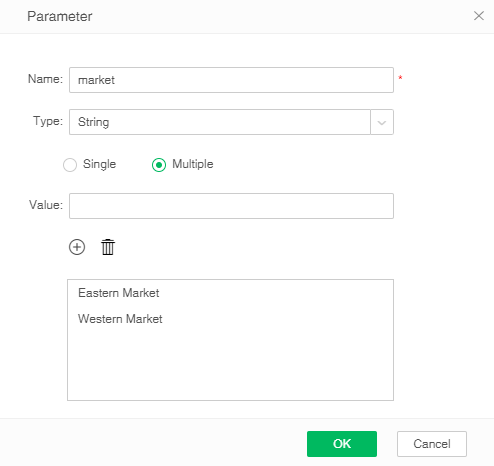
When the user selects "Multiple", multiple parameter values can be set, as shown in the following figure.
➢Description: After the user subscribes to the report in the report, the scheduling task interface will generate the corresponding email sending job. At this point, the job's directory is the folder where the Report- report is located - the name of the report. The name of the job is the user name of the logged-in user.
➢Note: The jobs generated by the report subscription are saved in the Subscribe folder and the subscription-related folders or jobs are not editable.