|
<< Click to Display Table of Contents >> Customized Task |
  
|
|
<< Click to Display Table of Contents >> Customized Task |
  
|
Customized task, namely users can implement customized tasks through the interface defined by Yonghong.
❖Customized Tasks
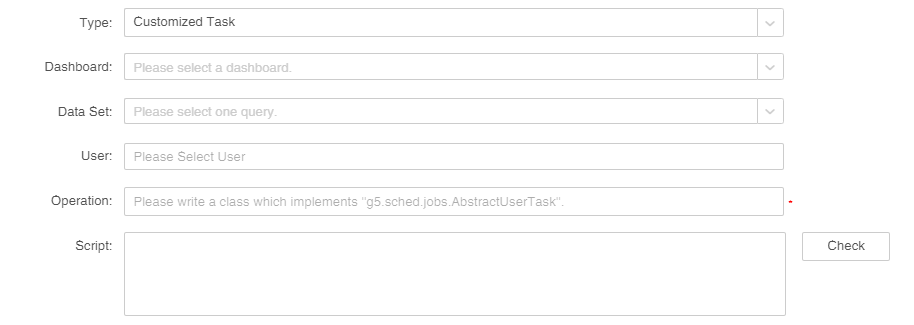
1.In the task area of the new job or the new task interface, select the task type "Customized task" as shown in the figure below.
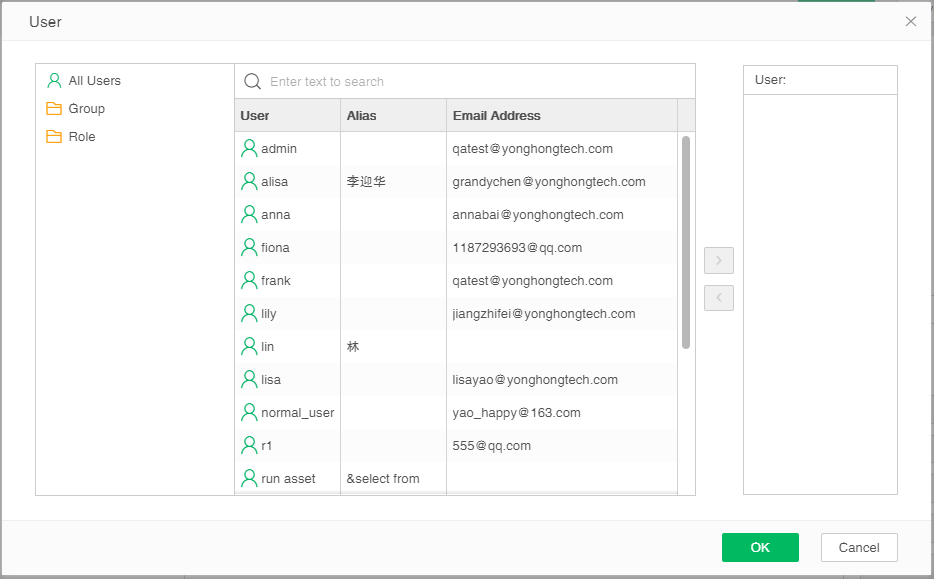
2.Set up users. In the user column, add the user corresponding to the custom task, which can be added by user, group, and role. When you click the add button in the user bar, you can open the user selection dialog box. In the dialog box, select the required user, group or role and add it to the user.
Note: Yonghong Desktop does not support setting users.
3.Set the operation class. The operation implements an interface of the user-defined class, which is used to write the class name of the user-defined class, and the user-defined class should be placed in the directory that the server can find. This setting is required.
4. Set up the script. Users can receive some parameters through the script to control the custom task. When this task is performed, the script has the highest priority. Only param[XX]="xx" is supported.
❖Replacing Data Sources for One or More Dashboards
It is used to complete the change of data sources for one or more dashboards.
When the user needs to rebind the data source of one or multiple dashboards, rapid data source replacement can be carried out via this task.
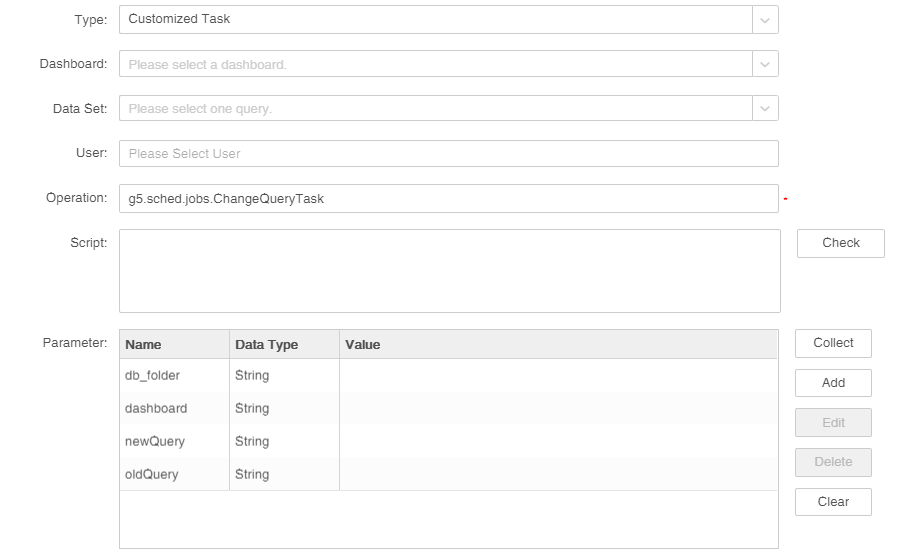
1.In the task area of the new job, or create a new task interface, select the task type "Customized task".
2.Select the desired dashboard from the existing dashboard.
3.Select the required data set in the existing data set.
4.Enter g5.sched.jobs.ChangeQueryTask class in the action box.
5.Set parameters in the data set. After clicking the Collect button, some related parameters will be collected in the parameter list.
newQuery: New data set used for replacement. Select [Parameter] The parameter herein refers to specific parameter for data source replacement. After click the collection button, the parameter list will collect some relevant parameters. Query, such as: query/coffee sales statistics 2. sqry.
oldQuery: The old data set to be replaced. After select the oldQuery column, click the edit button. Parameter dialog will pop up. Enter the name of the data set and add query before the name, such as: query/coffee sales statistics 1. sqry.
db_folder: Replaced dashboard directory. After select db_folder column, click the edit button. Parameter dialog will pop up. Enter the name of the dashboard directory, and add dashboard before the directory name, such as dashboard/directory 1. If the dashboard parameter has no input value, all dashboards under the directory will be replaced.
dashboard: Replaceed dashboard. Select the parameter dashboard. Click the edit button. Parameter dialog will pop up. Enter the name of the dashboard to be replaced. If the parameter db_folder has no input value, dashboard directory can be added before it directly. For example: dashboard/ directory 1/ Data source replacement tt. If the parameter db_folder has an input value, it only needs to enter the dashboard name. If need to replace the data set of multiple dashboards, a comma needs to be added in the middle, such as: dashboard/dashboard 1 and dashboard/dashboard 2.
❖Merge Multiple Data Mart Folders
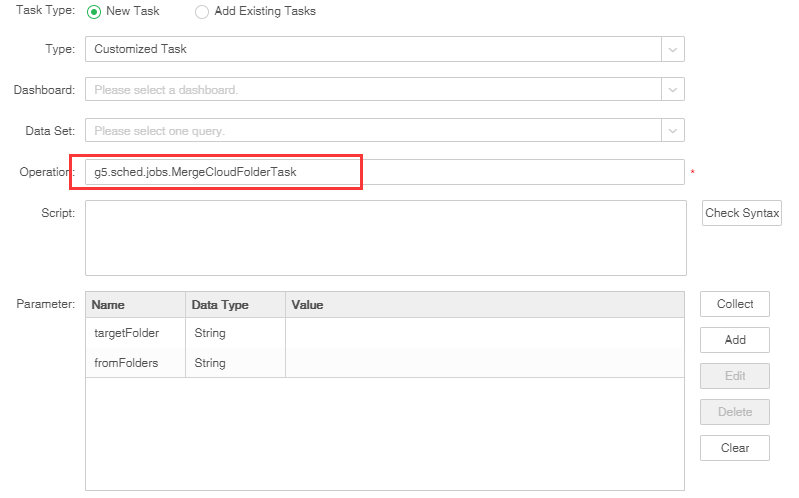
1.In the task area of the new job or the new task interface, select the task type "Customized task".
2.Enter g5.sched.jobs.MergeCloudFolderTask to the operation box.
3.The parameter refers to merge the specific parameters of the mart folder. After click the collection button, the parameter list will collect some relevant parameters.
fromFolders: Participate in the merged source cloud folder. After select the fromFolders column, click the edit button, pop up the parameter dialog and input the name of the source cloud folder.
targetFolder: Generate the targetFolder after merge the mart cloud files. After select the targetFolder column, click the edit button, pop up the parameter dialog and input the name of the target cloud folder.
➢Note: targetFolder needs to enter the name of the non-existing cloud folder.
❖Merge Multiple Data Mart Files
Multiple small sets of data make up one data
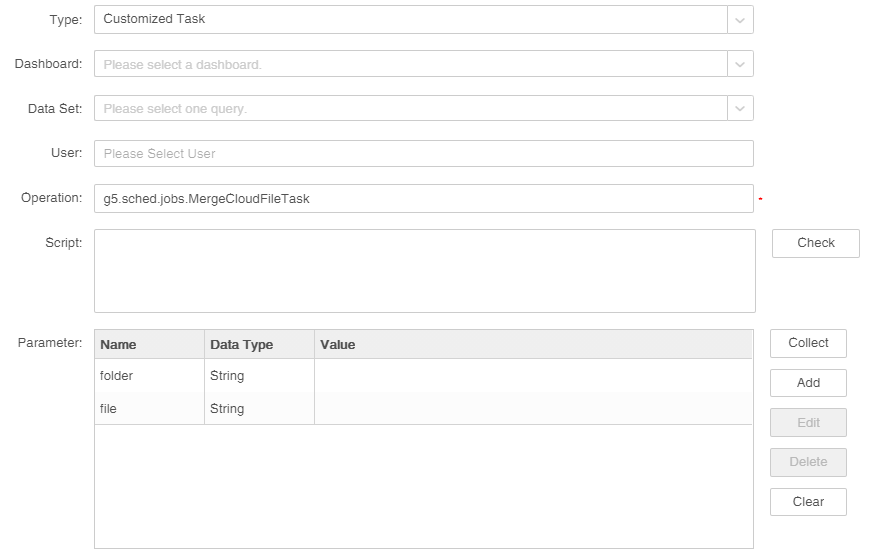
1.In the task area of the new job or the new task interface, select the task type "Customized task".
2.Enter g5.sched.jobs.MergeCloudFileTask to the operation box.
3.The parameter refers to merge the specific parameters of the mart folder. After click the collection button, the parameter list will collect some relevant parameters.
folder: Participate in the merged source cloud folder,After select the folder column, click the edit button, pop up the parameter dialog and input the name of the source cloud folder
file:File prefix of small set of data,After select the file column, click the edit button, pop up the parameter dialog and input the name of File prefix of small data
❖Merge Multiple Meta Files
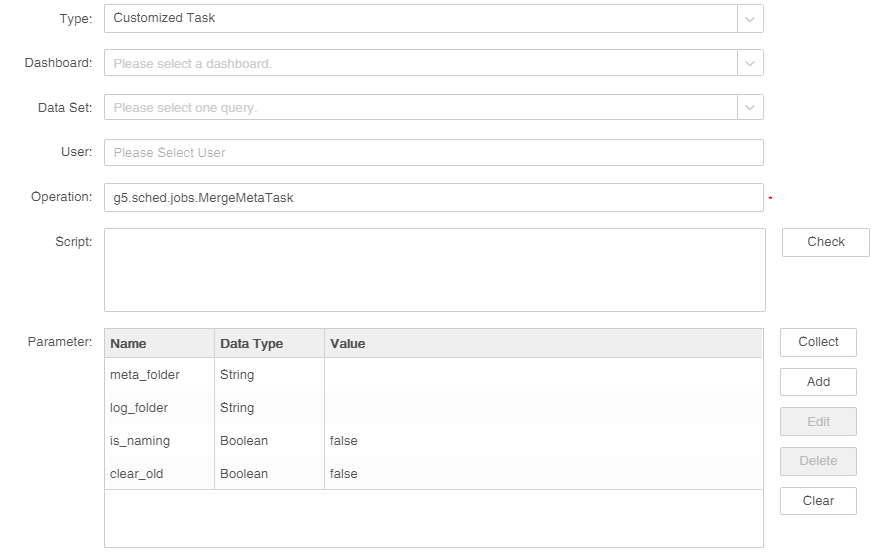
1.In the task area of the new job or the new task interface, select the task type "Customized task".
2.Enter g5.sched.jobs.MergemetaTask to the operation box.
3.The parameter refers to merge the specific parameters of the mart folder. After click the collection button, the parameter list will collect some relevant parameters.
Clear_old: Controls whether the old meta is to be emptied, leaving only the new meta. After selecting the clear_old column, click the Edit button to bring up the parameter dialog box. When you need to clear the old meta, the edit value is true; otherwise, the edit value is false.
Meta_folder: The source folder where the merged meta is located. After selecting the meta_folder column, click the Edit button to bring up the parameter dialog box and add the directory where the meta to be merged is located.
Is_naming: Switch the type of meta to be merged. After selecting the is_naming column, click the Edit button to bring up the parameter dialog box. When you need to synthesize the naming.m file, the edit value is true.When you need to synthesize qry_sub.m, the edit value is false.
Log_folder: The log file directory for custom task running. After selecting the log_folder column, click the Edit button to bring up the parameter dialog box and add the directory where log log generation is required.
❖Import Incremental Data To Data Mart
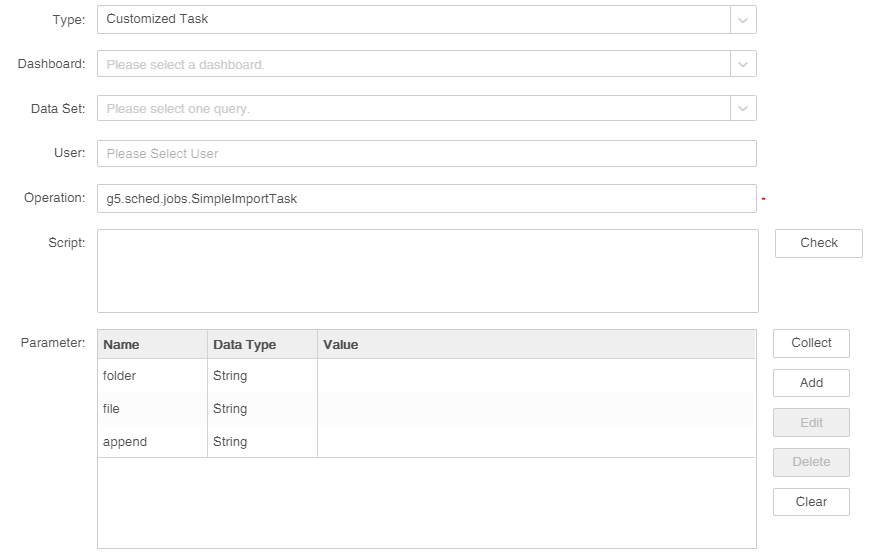
1.In the task area of the new job or the New Task screen, select the task type "Customized Task".
2. Select the query in the "Data Set".
3.In the Operation box, enter "the g5.sched.jobs.SimpleImportTask" action class.
4. Add parameters in the parameter column
folder:You can enter the name of the data mart folder for incremental import data generation. Parameter type is stringParameter type is string.
file: Sets the name of the file for which incremental import data is generated. Parameter type is string.
append: "Additional" introduced in the same section as Task/Incremental Import Data to Data Mart. The parameter type is Boolean and the value is true/false.
