|
<< Click to Display Table of Contents >> Set Form Parameter |
  
|
|
<< Click to Display Table of Contents >> Set Form Parameter |
  
|
❖Usage Scenarios
Through form parameter component, the batch data operation scene of one-dimensional table is realized, for example: students enter scores of each subject;
Through text parameter, listBox (parameter default in the form of list), comboBox (parameter default in the form of drop-down list) to achieve the information gathering, such as students registration information;
Through the combination of form parameter, text parameter, listBox and comboBox, some duplicate filling scenarios are realized, such as financial data reporting.
❖Create Dashboard
Add one or more parameter components, such as form Parameter, text parameter, listBox and comboBox to the dashboard.
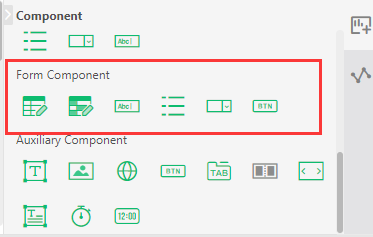
❖Set Form Parameter
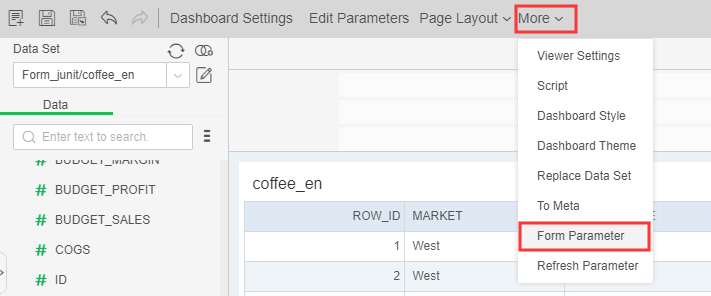
Go to the top toolbar of Create Dashboard -> [More] -> [Form Parameter].
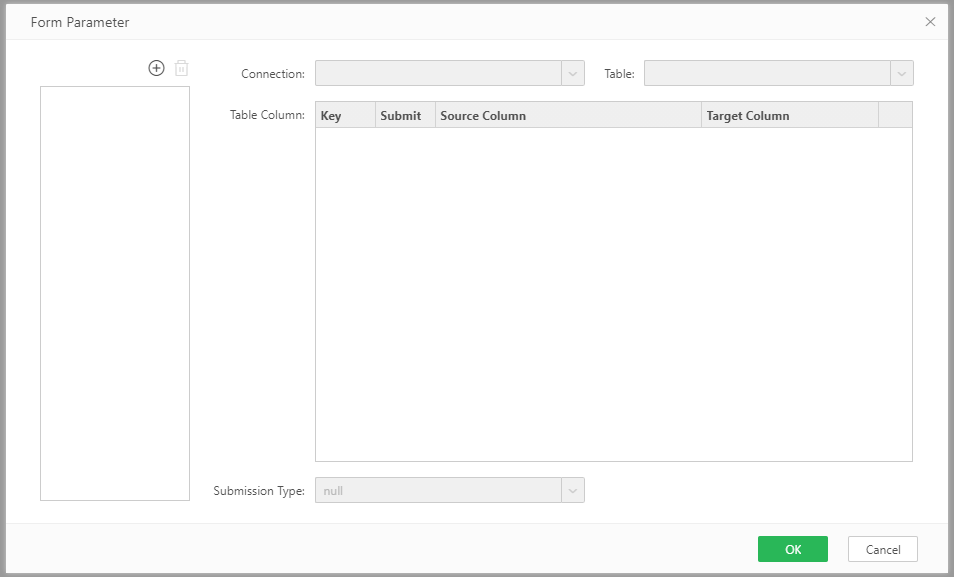
•Set the Submission
[Add] Click the add button ![]() in the upper left corner of the pop-up box to add the submission.
in the upper left corner of the pop-up box to add the submission.
[Delete] Select the item in the left list and click the delete button ![]() in the upper left corner of the pop-up box to delete the submission.
in the upper left corner of the pop-up box to delete the submission.
[Rename] Double-click the item in the left list to rename it.
[Connection]
1. The drop-down box option is the established data connection in the module "Create Connection"
2. Data could be filled into the following database: Oracle, MySQL, DB2, SQLServer, PostgreSQL, Derby, Gbase8a, Hana, GaussDB100, GaussDB200,, analyticdb, Hive.
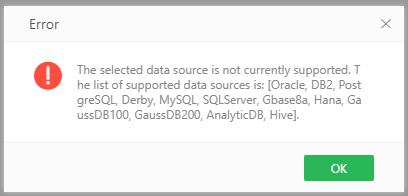
[Table] After selected the connection, the database and table of the selected connection will be listed automatically. If the data source cannot be loaded automatically, click the refresh option in the right-click menu, and then the tables under the data source can be searched. For detailed usage of data source search, please refer to Manage Connection section.
[Table Column]: Match the source columns bound to the parameter component with the target columns in the database so that the data filled in the parameter component could be filled in the database table.
[Key]: The key column is the condition when submitted to the database. You can select one or more fields as the key. Data cannot be updated and deleted when the key is not determined.
[Submit]: The columns with Submit checked means that you want to commit the column change to the database. The columns whose submit attribute is not checked cannot be submit to the database.
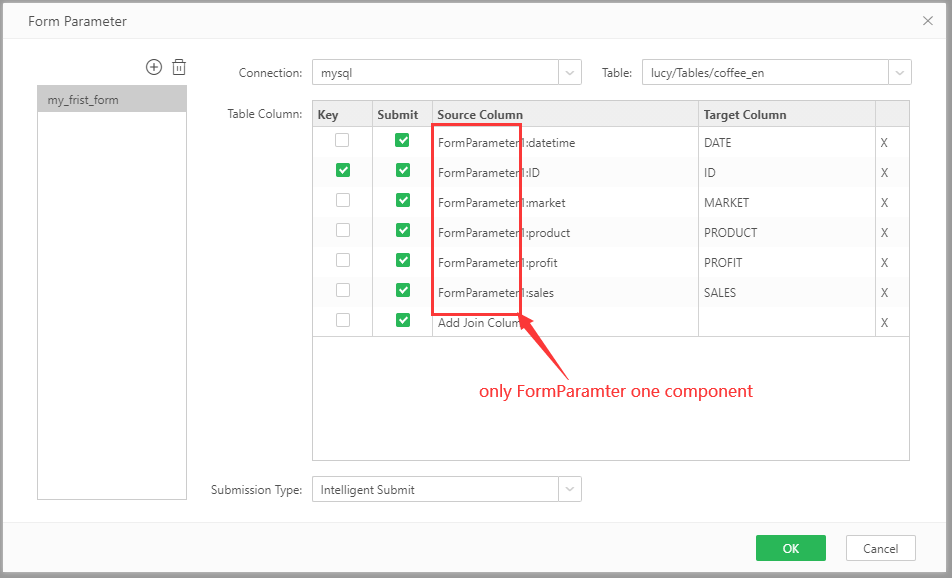
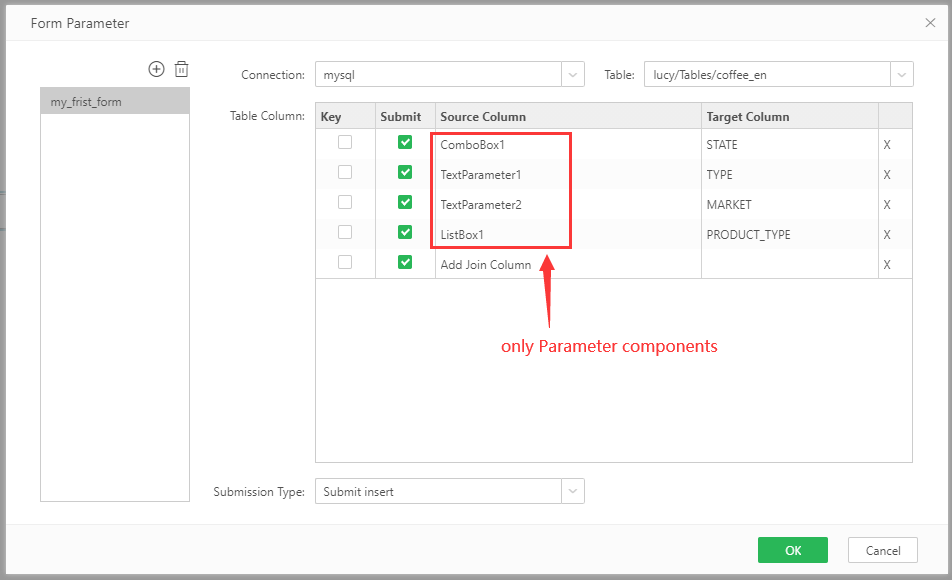
[Source Column]: It could be the text parameter, listBox, comboBox, and columns bound to the form parameter. For example: FormParameter1:ID ,FormParameter1:Sales , TextParameter1, TextParameter2, ListBox1,ComboBox1...
[Target Column]: It represents where the data will go. Usually it is the field of the selected table of the target database.
[Delete]: Remove the matches between source and target columns.
[Submission Type] set the submission mode of the current submission. Options include: null, Submit Insert, Submit Update,Submit Delete, Intelligent Submit. You can refer to Set Submit section below for details.
•Insert commit: insert the data and execute the inset statement in the database
•Update submission: update the data and execute the update statement in the database. It is necessary to specify the conditional column in the update submission, which is equivalent to locating the where condition part of the data to be modified in the update statement
•Delete submit: delete the data and execute the delete statement in the database. It is necessary to specify the conditional column in the deletion submission, which is equivalent to locating the where condition part of the data to be deleted in the delete statement
•Intelligent submission: according to the data changes, intelligent judgment to do "add, delete and modify" operation:
A.Scenario 1: the data bound on the form class component is the same as the backfilled target table, and the target table of the database has a primary key (for the primary key, take "Id" as an example), the intelligent submission judgment is as follows:
1. Delete the row data
2. Add the existing ID data, update the ID data, and insert the existing ID data
3. Modify the row data to update
B. Scenario 2: the data bound on the form class component is the same as the backfilled target table, and the database target table has no primary key. The intelligent submission judgment is as follows:
1. Delete the row data
2. Insert the data of the new row
3. Modify the row data to update
C. Scenario 3: the data bound on the form class component is not the same as the backfilled target table, and the database target table has a primary key (for the primary key, take "Id" as an example), the intelligent submission judgment is as follows:
1. Delete the row data
2. Add the existing ID data of the target table and update the ID data; add the existing ID data of the target table and insert the ID data
3. Modify the existing ID data of the target table and update the ID data; modify the existing ID data of the target table and insert the ID data
D. Scenario 4: the data bound on the form class component is not the same as the backfilled target table, and the database target table has no primary key. The intelligent submission judgment is as follows:
1. Delete the row data
2. Insert the data of the new row
3. Modify the existing column data of the target table, update the conditional column data; modify the existing rule column data of the target table, and insert the conditional column data
Notes:
•When the submission type is "null", it means that the submission type is not specified. It has no meaning for the data submission on the toolbar and the type of commit buttion, but it would not effect the submission realized by the use of script.
•When setting columns match, "Intelligent Submit" is only available when the source columns are all from the Form Parameter component or FreesyleForm component.
❖Form Type
Reporting classification: according to the actual application scenario, the reporting set can be divided into the form parameter component, other parameter components and the mixed.
1. Form parameter components : the source columns are all from the form parameter components, and the settings are shown as follows:
2.Parameter components: the source columlns are all parameter components (one or more of text parameter, listBox and comboBox parameters), and the settings are as shown in the figure below:
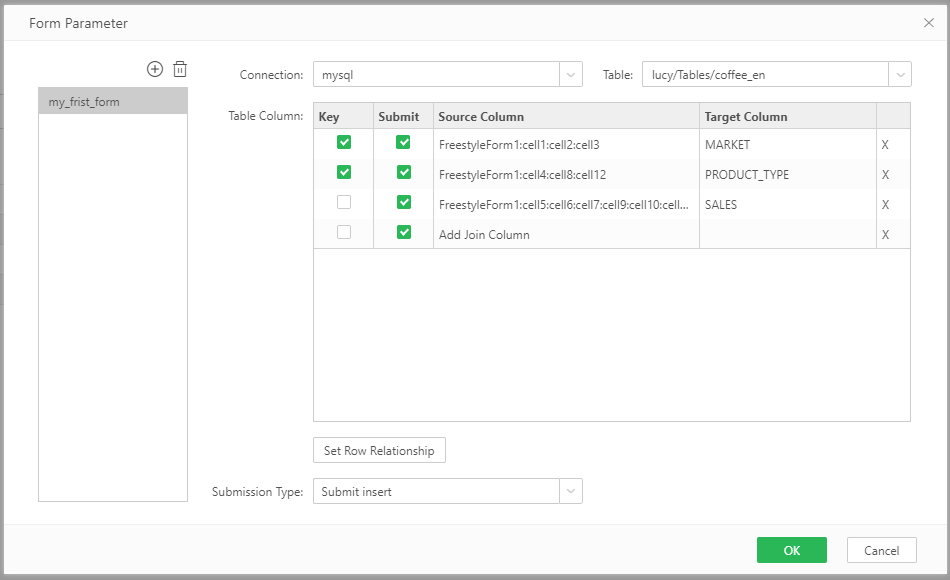
3. Freestyle Form component: the source fields are all the cells on the free table filling component. The settings are shown in the figure:
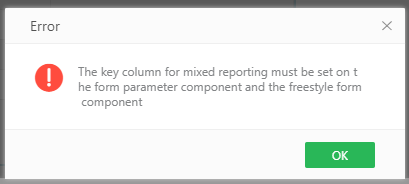
4. The mixed: Part of the source columns come from the form parameter component, and part come from the other parameter components, as shown in the figure:
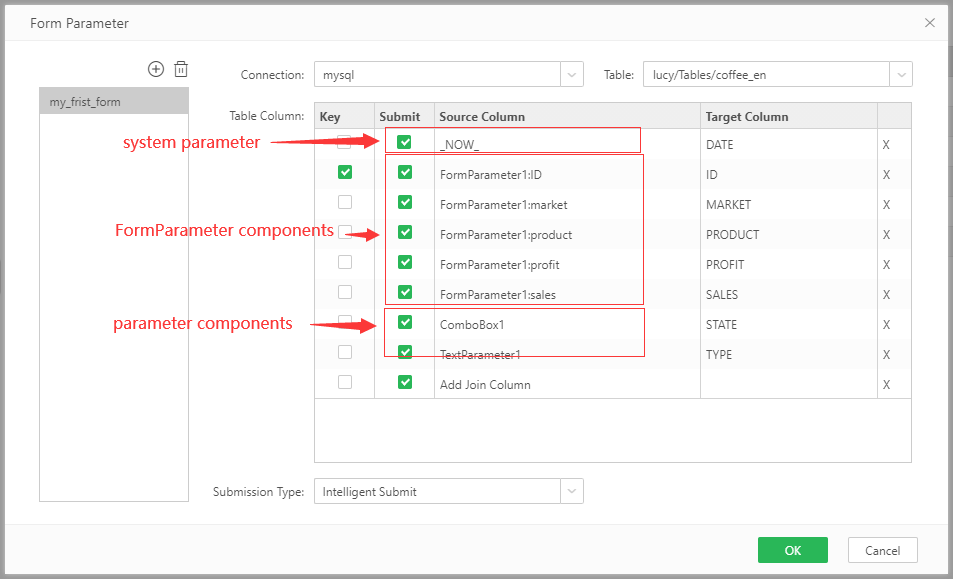
Note: In addition to the parameters above, you can also use the built-in parameters that come with the system, a total of four.
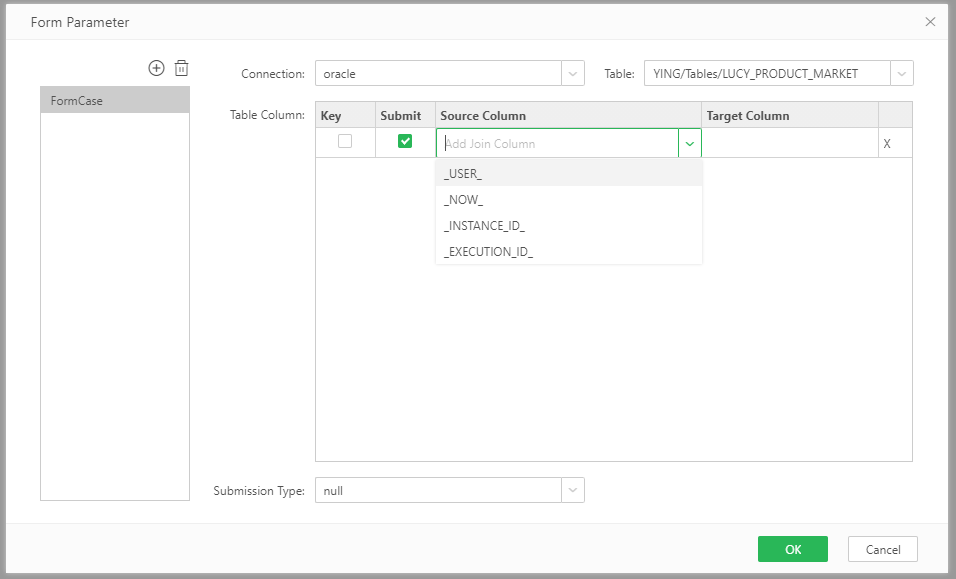
_USER_: the name of the login user.
_NOW_: current time.
_INSTANCE_ID_: Process ID (used by the workflow module, automatically generated, used to fetch data).
_EXECUTION_ID_: Branch or sub-process ID (used by the workflow module, automatically generated, used to fetch data).
Clicking "submit" is the last step of data entry. After clicking "submit", the corresponding operation will be passed to the database, and the database will "update", "insert" and "delete" the target table according to the submission type and the data change.
The submission could be done by the "commit button" component and the "submit operation" of the toolbar. See the section Set Submit for details.
❖Submit Data
We will introduce how to insert, update, and delete data in database by Yonghong form parameter component. Please refer to Operations of Form Parameter Component in View Dashboard.